"How do I clear my history on my iPhone? I'm planning to give my old iPhone 6 to my girlfriend."
Everyone has secrets. And it's not weird that you worry that someone may see your search history, call logs, and message conversations, etc. And what you need is to know how to clear history on iPhone to protect your privacy.
Fortunately, it is not difficult. Now let's check how to do it.
Part 1. Delete Safari History and Website Data on iPhone
Part 2. Selectively Remove Safari Search History on iPhone
Part 3. How to Clear Google Browser History on iPhone
Part 4. Permanently Delete History from iPhone (100% Guarantee)
Part 5. How to Remove Call History from iPhone
Part 6. How to Erase Message History on iPhone
If you want to erase all the search history, cache, clear cookies and other browsing data from Safari on iPhone, here are the steps that you're looking for.
1. Go to Settings, swipe down and select Safari > Clear History and Website Data.
2. When it prompts you, tap Clear History and Data to confirm delete safari history on iPhone and other devices that your iCloud account has logged in.
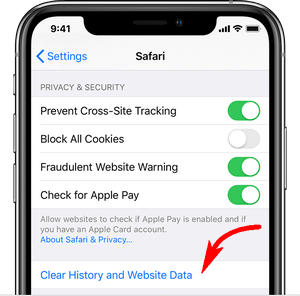
Note: your search history will be retained while clearing cookies if you go Settings > Safari > Advanced > Website Data > Remove All Website Data.
In case you can't clear internet history because the button is grayed out, please head back to Settings and tap "Restrictions". Then enter your passcode and tap Websites > All Websites. After that, repeat step 1 and 2.
Besides, you may like to know how to turn on Private browsing in Safari.
Check this solution if you want to delete only 1 or a few recently browsing history on Safari from iPhone rather than clearing all browsing data.
1. Launch Safari and tap the open book icon to open the bookmarks pane.
2. On the top, tap the clock icon to open the History pane.
3. Tap on one entry and quickly swipe left, then tap on "Delete". Or you can scroll down and tap "Clear". There'll be 4 options "Last hour", "Today", "Today and yesterday" and "All time".
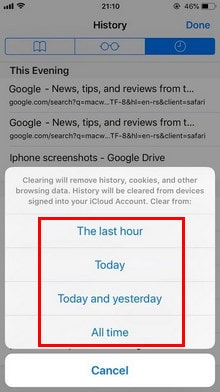
This works for deleting history on iPhone 5/6/6s/7/8/X/11 running on iOS 13, 12, 11, 10, although the process could be slightly different.
If you installed Chrome or Google app on your device and need to clear web history on iPhone, follow the steps below. There're 2 options:
1. Launch the Chrome app on your iPhone or iPad.
2. Scroll down to the bottom and you'll see the More (3 dots) - tap it. Then tap History - the clock icon. (Or go Settings > Privacy)
3. Tap Clear Browsing Data and make sure "Browsing history" is selected.
4. Tap "Clear Browsing Data" > "Clear All" > Done
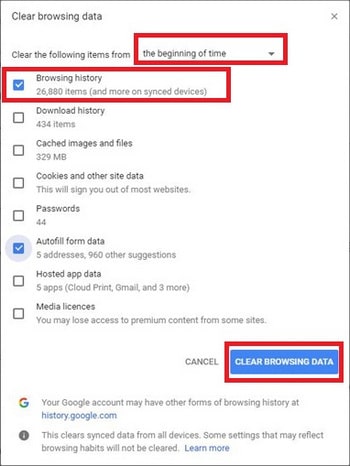
Also, you can selectively delete a couple of searches from it on iPhone Just go More (3 dots) > History (the clock icon) > Edit. Then you can check the content you want to remove, and tap Delete > Done
1. Open the Google app on iPhone and tap Settings (the gear icon)
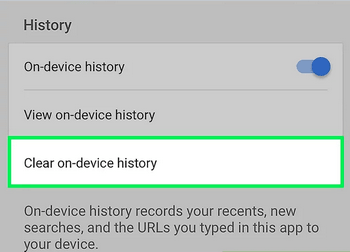
2. Find and tap Privacy > Browsing > History > Clear on-device history
The only issue is, this only deletes the entries of your search history in the Google app but not from your account.
The methods above are helpful, but the only thing is, the data is not completely erased on device. They could be retrieved via using recovery tools
So, if you need to permanently delete history on iPhone, it's best to use software like FoneCope iPhone Data Eraser. Additionally, it also can thoroughly remove data on your device, such as permanently delete photos, videos, messages, and clear Instagram caches, etc.
1. Click to download the eraser on PC or Mac. After installation, connect your iPhone to computer with USB.
2. Select "Erase Deleted Files" and click Scan. The loading process usually takes a few minutes to finish, please wait.
3. Click "Safari History" and then you can preview the specific details on the right. Next, select the history you want to delete and click Erase Now to clear iPhone search history.
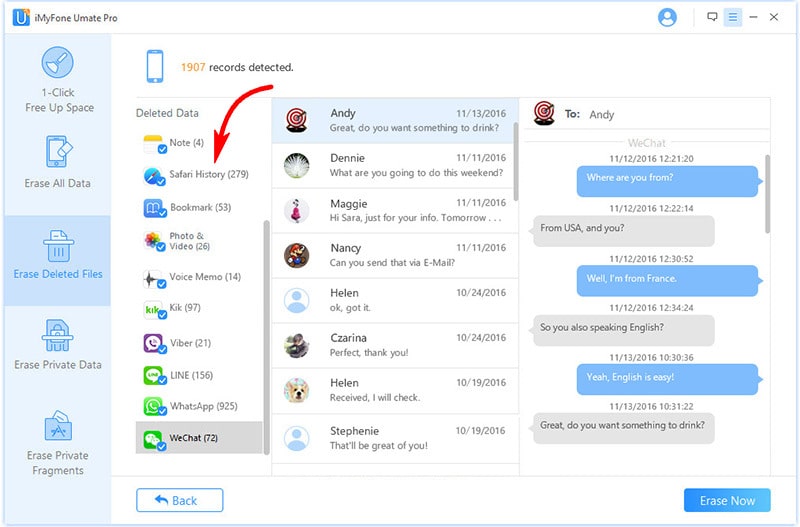
Voila! Isn't it so easy to remove history from iPhone? I guess you would feel the way I do. Now your little secret is forever gone. Plus, you can use it to clear search history on your iPad, too.
Need to keep your call history confidential? This is the section that talks about how to erase call history on iPhone.
1. Open the Phone app on iPhone and tap "Recents" to check the recent phone call history.
2. At the top, tap "Edit". Then tap the red icon to delete the record in the call log.
Can you clear all in once? Sure! Tap "Clear" in the upper-left corner.
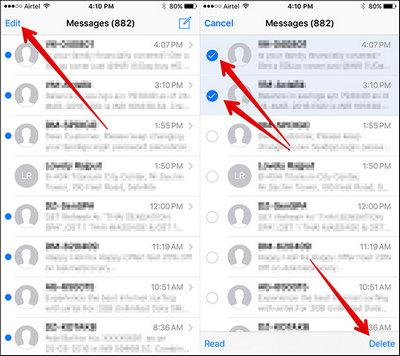
It's very likely that you know how to delete unwanted message history on iPhone: Open messages app > tap Edit > select which to delete > tap Delete. But do you know how to set iPhone to automatically delete message history on a regular basis? If interested, keep reading!
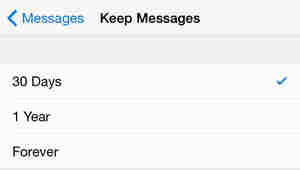
1. Open Settings on iPhone and then tap "Messages".
2. Select "Keep Messages" and choose the frequency of auto-deletion, 30 days or 1 year instead of Forever.
Furthermore, I suggest that you should also clear the iPhone keyboard history. Because when you type the first 2 or 3 letters, the keyboard often displays the recently used words or digits, and it could even be your account password. Hence, let's check how to delete keyboard history on iPhone.
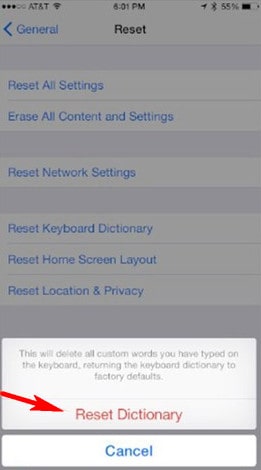
Go to Settings and select "General". Then select "Reset" and tap "Reset Keyboard Dictionary".
All applications leave traces on iPhone. To delete all history on iPhone, including erasing browsing history, it's fair well to reset iPhone to its original settings. All data will be removed, though. Thus, it's best to use iTunes or iCloud to make a backup before resetting iPhone.
1. Go to Settings and tap General.
2. Swipe down until you find "Reset", then tap it.
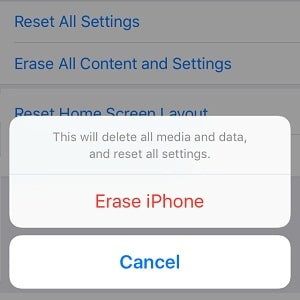
3. Tap "Erase all content and settings". And it will start erasing history and wipe your iPhone. After the restore, you can set up iPhone as a new device.
You can get help from my old post if you need to erase iPhone without password.
In total, in this article, there are 8 ways to delete history on iPhone, including searches, browsing data, phone calls, text messages, keyboard and more. I sincerely hope this can make it easy for you to erase iPhone history and protect your privacy.
How do you clear your history on your iPhone? If you find any other effective ways to solve the problem, leave a comment and share it with us. We should and would never stop trying to do better.