"A message prompted that 'the iPhone could not be synced because the sync session failed to start', and I can't back up my iPhone X. How do I fix it?"

Do you know why the iPhone sync session failed to start? In fact, dealing with this issue is not difficult. This article will briefly explain some of the reasons.
After telling you the relevant information, we will continue to show you 9 solutions to handle the "iTunes sync session failed to start" error. Let us take a look now.
Part 1. Why does "iTunes Sync Session Fail to Start" Happen?
Part 2. Common Ways to Fix "iPhone Sync Session Failed to Start" Error
Although you like using iTunes, the "sync session failed to start" error brings you a lot of trouble when synchronizing the iOS device with iTunes.
Actually, there are several grounds to this problem:
1. The iTunes or related components install improperly or incompletely.
2. iTunes crashes.
3. iTunes and components are not updated.
4. iOS lighting (USB) cable is counterfeit (not the original).
5. The iTunes sync option isn't set up.
You'll find 9 effective methods to fix iPhone sync error in this part.
If apps are running, the sync process could be interrupted, and iPhone sync failed to start. So, it is easy and effective for you to force closing apps.
For iPhone with Home Button:
Step 1. Unlock iOS device and switch to Home Screen.
Step 2. Press and hold the Home button twice, after which you will see all the running apps on the screen. Then scroll up to close all running applications.
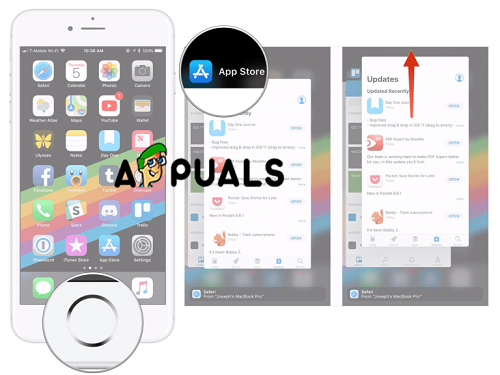
For iPhone without Home Button:
The way to close running applications on the iPhone that have no Home button differs. (Including iPhone X/XS/XR/XS Max)
Step 1. Move your fingers up from the bottom of the screen.
Step 2. In the middle of the iPhone's screen, pause your finger for a second and you'll see all the application cards.
To fix sync failed to start, check if your iPhone is successfully connected to the computer. Ensure that your USB cable has a direct connection to the iOS device and computer's USB port.
Because if you want smooth sync between your iPhone and computer, a proper connection between them, an original USB cable and normal USB port are essential.
If your iTunes and iTunes component software is out of date, you may be trapped by the waiting for sync to start problem. Therefore, you can take the following measures to update iTunes.
Step 1. Make sure your computer is connected to a good network.
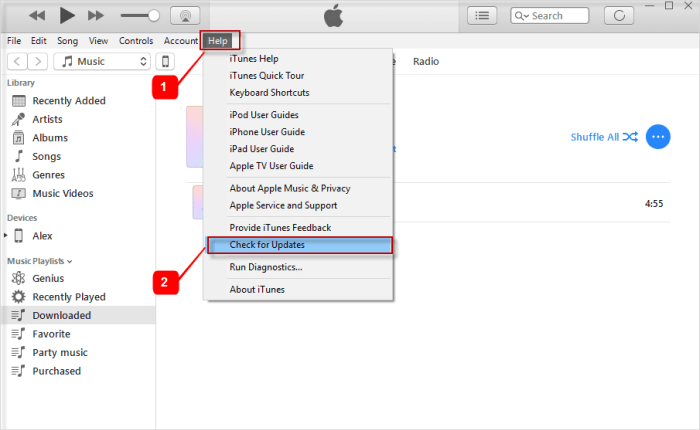
Step 2. Run iTunes, find "Help" and click "Check for Update".
Step 3. Update the iTunes according to the tips given.
If the iTunes backup process is interrupted, iPhone could not be synced because the sync session failed to start since iTunes will attach the old backup when syncing, instead of creating a new backup. So, to handle iPhone won't sync with iTunes errors, you'd better remove the previous backup. After that, new backups can be made.
You need to take the appropriate steps to delete old iPhone backups:
Step 1. Select the right iOS device. Choose the right one if there is more than one device under Device Backups
On Windows: Go to Edit > Click Preferences > Click Device
On Mac: launch iTunes - COMMAND + > click Preferences > click Device
Step 2. Click "Delete Backup" and then "Reset Sync History"
Step 3. close iTunes and restart your iPhone and computer
Step 4. Run iTunes and try to sync again.
TunesFix is the preferred method for solving iTunes problems. It not only fixes iTunes installation, backup, sync issues, but also makes your computer perform better by cleaning up iTunes trash, such as fix iTunes apps not showing up, an invalid response from iPhone, and more. More importantly, the use of the program is very simple.
Its four obvious advantages:
1. Easy to use, just a few clicks.
2. Can solve more than 100 iTunes problems with a high success rate.
3. Delete useless iTunes backup of iPhone, iPad, and iPod
4. Drill down on iTunes and its related components.
Let's check how to use it to fix the iTunes sync session failed to start steps by steps.
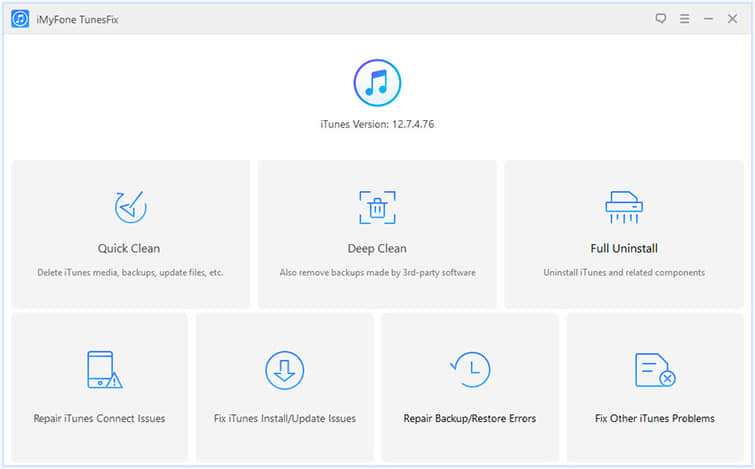
Step 1. Download and launch TunesFix on your PC, and then in the home interface, choose "Repair Backup/Restore Errors".
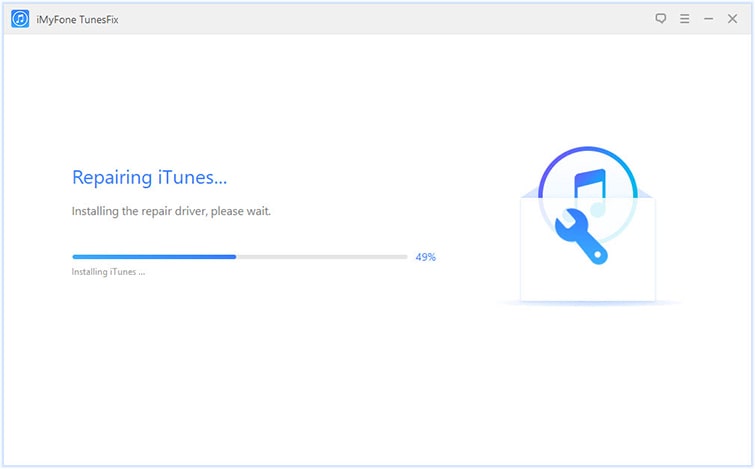
Step 2. Click "Repair" and wait for a few minutes.
Step 3. Try to sync your iPhone to iTunes via USB once again. If the backup problem still troubles you, go back and try "Fix Other iTunes Problems" mode.
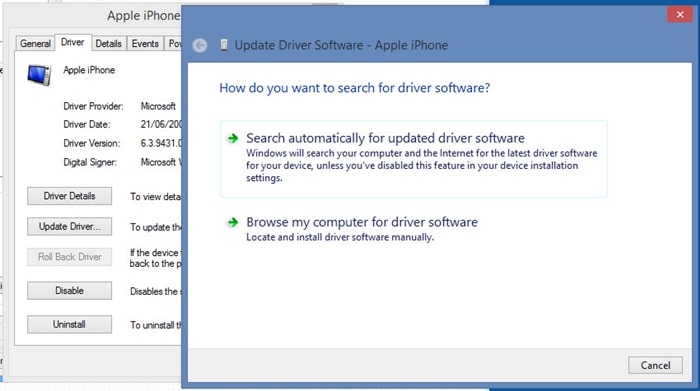
The iTunes sync problem could occur if the driver is too outdated. Using the latest version of the driver is beneficial for syncing iPhone and iTunes. Here are the steps to update drives on PC:
Go to Device Manager on your computer > Right-click on iPhone > update to the latest version of Drivers (just follow the prompted guide)
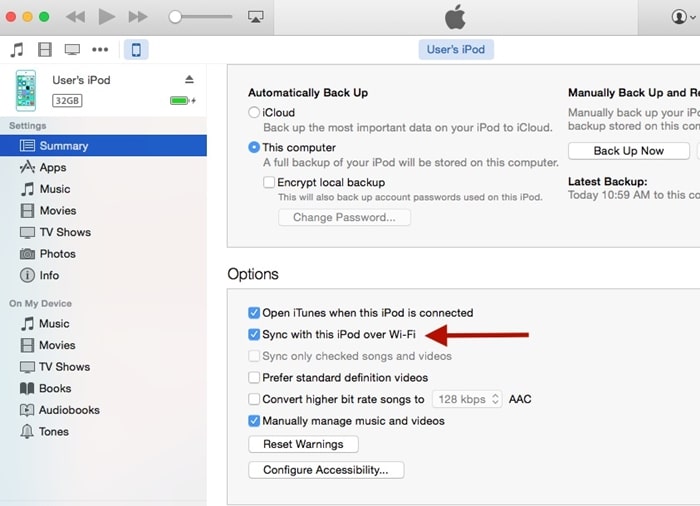
When using USB cable backup causing iTunes sync problem, you can choose to sync your iOS device to your PC via WiFi.
Launch iTunes and click Summary > Go to Options tab > Turn on "Sync with this iPhone over WiFi" > save the changes
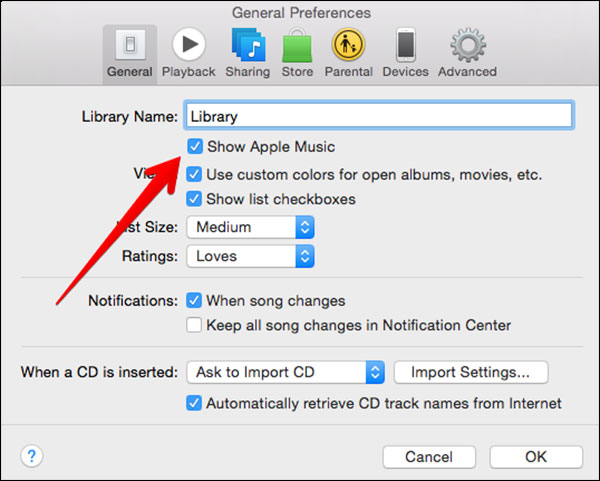
Maybe you never thought that multiple conflicts between iTunes and Apple Music apps would usually cause "iPhone sync session failed to start". So, you should disable Apple Music.
Step 1. Unlock your iPhone and go to settings, and then disable Apple Music.
Step 2. Launch iTunes and go to General Preferences. Then Turn off "Show Apple Music".
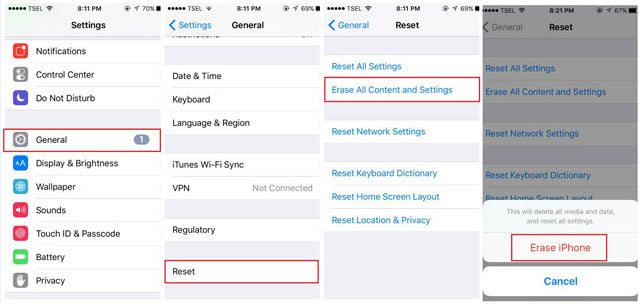
If none of the above methods can resolve the iTunes sync session failed to start error, you can finally try restoring the device to factory settings. Since setting up the iPhone again will result in data loss, please do not use it until you have tried other methods.
Open Settings > tap General > select Reset > choose Erase All and Settings > tap Erase iPhone
Then your phone will automatically restart. After that, try to connect the iPhone to iTunes and sync.
In this article, you've learned 9 solutions to how to solve the "iTunes sync session failed to start". I wish this will give you a hand and get you out of trouble.
Anyway, that's all. Please always know that we appreciate your comments.