“How do I backup the contents of the iPhone to computer without using iTunes or iCloud? I hate iTunes but the backup/restore feature is the best thing ever. However, after exchanging my iPhone 4 times and restored 3 times, the phone storage is pretty much full.”
Usually, it’s preferred to use iTunes to backup and restore iPhone data on PC. However, sometimes when you connect your iPhone/iPad to computer, iTunes cannot run smoothly or the backup size is too large. At this point, you should know how to use its alternative—iCould as well as FoneCope iOS Backup & Restore.
It is pretty easy to use, and in this page, you are going to learn how to backup and restore an iPhone data without iTunes.
In part 1, you’ll know how to use iCloud service to backup iPhone 5/6/7s/8 plus/X data without iTunes. It’s free but slow. Because iCloud make online backup for your iPhone. The internet network connection could be to blame. If you’re storing a great amount of data on device, iCloud is not a good choice.
In part 2, a backup & restore tool will be introduced. It can not only do mostly what iTunes can do for you, but also make full or selective Backup & Restore without iTunes become possible. Besides, it can back up large data on iPhone to computer (both Windows and Mac) at fast speed.
Part 1. Back Up iPhone without iTunes | Using iCloud
Tips 1. How to Restore iPhone Backup from iCloud?
Part 2. Backup iPhone to Computer without iTunes or iCloud | FoneCope
Tips 2. How to Restore Backup from PC to iPhone without iTunes
iCloud is free (for 5GB space by default), no installation required and reliable enough. (If you need more, you need to buy.) you can back up files on iCloud without plugging the device to the computer. The following steps are for you to learn how to backup iPhone to iCloud.
Step 1. Use your Apple ID to log in your iPhone/iPad iCloud: go to Settings > iCloud and log-in using your Apple ID and password.
Otherwise, you can create a new account or reset your password from here.
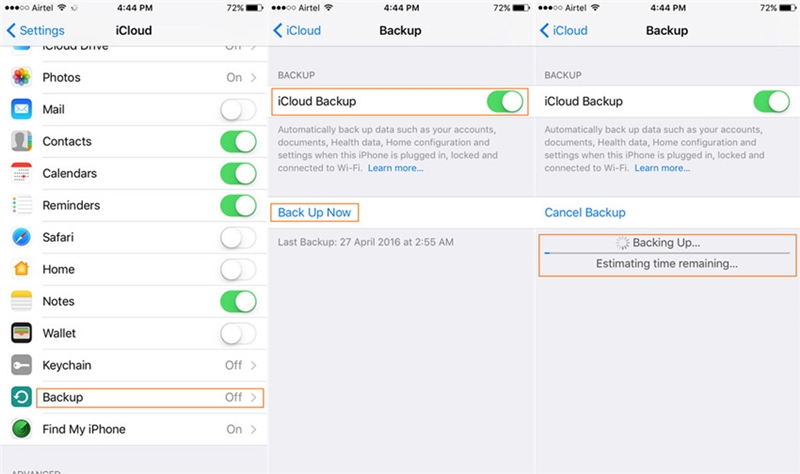
Step 2. Now, go back to Settings and choose “iCloud” and then, you will see “Backup” and please turn on the option of “iCloud Backup”.
Step 3. Automatic backup is available here, and you can also designate the time. Of course, you can take an immediate backup of your device, by tapping “Back Up Now”
Step 4. As the following screenshot, there are many options with “on/off”. Thus, you can also choose whatever you want including photos, mails, contacts.
If you have backed up iPhone data in iCould, you can find what you want through iCould. However, restoring iCloud backup is not as easy as backing it up, because there is no restore button in the settings of your iPhone. So, to restore means you need to reset the device to factory setting, losing all the existing data on iPhone. Now follow the steps and learn how to restore iPhone backup from iCloud.
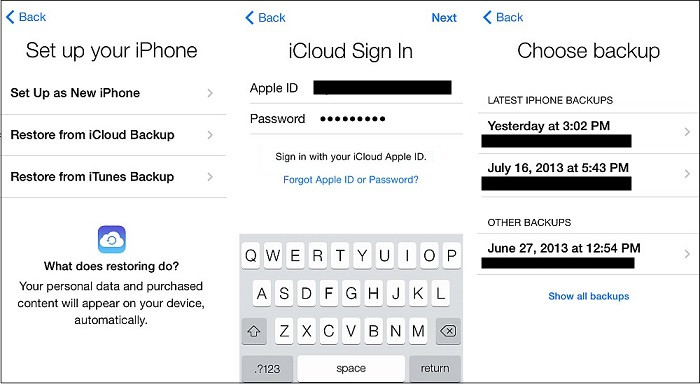
Step 1. Open and tap on Settings on iPhone, then find“General” and select “Reset" option, and at last tap on“Erase All Content and Settings”.
Step 2. You can see the Apps & Data on iPhone screen right now. Please follow the onscreen setup steps and then tap “Restore from iCloud Backup”
Step 3. Here iPhone ID is needed, because you are going to type your Apple ID and choose a backup. After that, the restoring begins.
If being asked to log in your Apple ID again, please sign in to restore the apps and purchases from iCloud.
Step 4. Restore. Because it may consume lots of data usage, I suggest you stay connected with Wi-Fi and wait patiently until the restoring process completes.
Fone Toolkit iOS Backup & Restore is a third-party tool, but it is easy to use with one-click backup without iTunes solution. And I am sure you will like it. Because not only you can selectively backup or restore your data, but also can preview their files before restoring. What a customized application. The specific steps are as follow.
Provided that your device is iPhone and iPad, this tool is able to backup most data types, including various privacy data.
Step 1. Make your computer connect with iPhone via USB
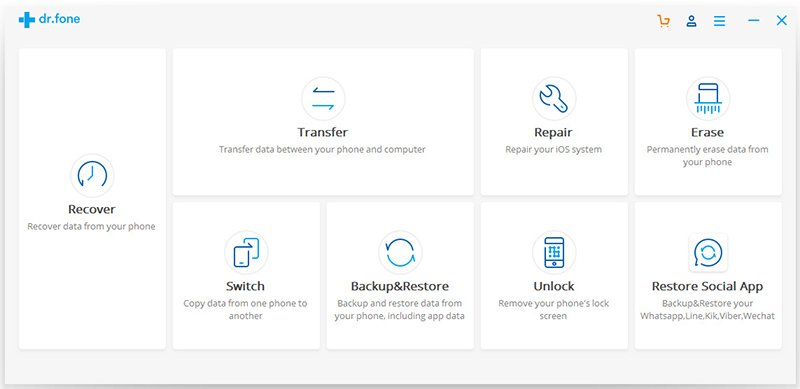
Launch this toolkit on your computer first. In the tool list, select “Backup & Restore”. After that, you are going to use the Lightning cable to connect your iPhone to computer. Once connected successfully, it will automatically detect and recognize your device.
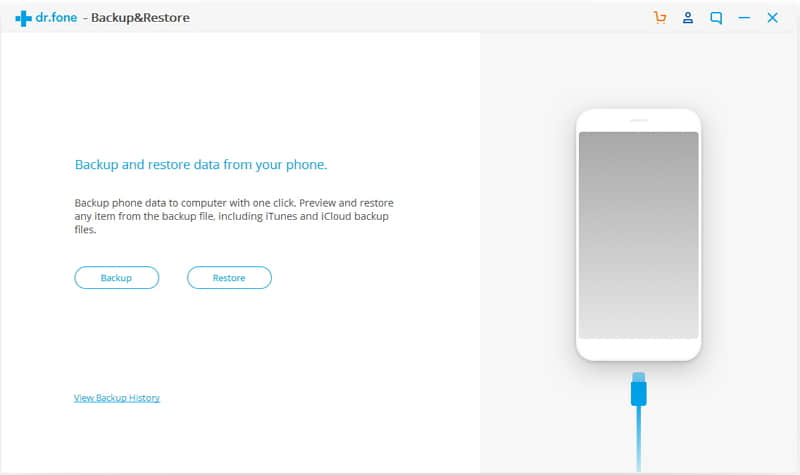
And then, click on the “Backup” button.
Step 2. Select the file types that you want to back up
When scanning is finished, here goes selection: select whatever you want to backup. Then click on "Backup”.
Actually, if you want the backup to follow a certain saving path, you can click on the folder icon below the file types.
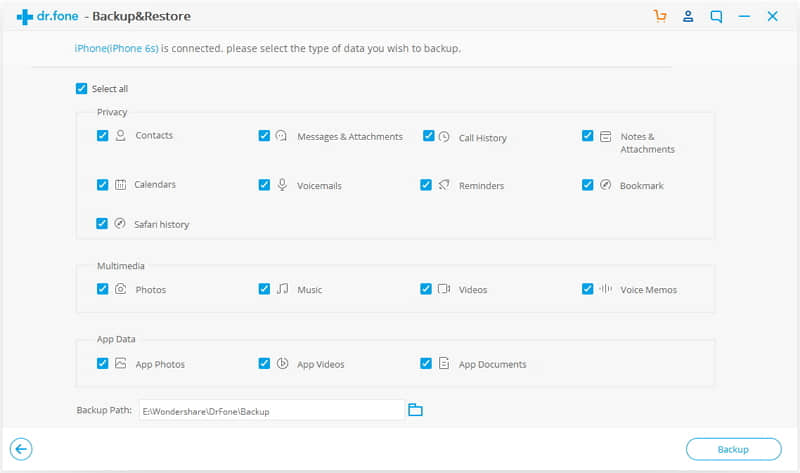
The process of backup will take several minutes, and the data storage on your device will affect how long it will take. Thraough iOS Backup & Restore, you can selectively backup lots of data, like contacts, messages, iMessages, notes, voicemail, voice memos, photos, videos, and app media data etc.
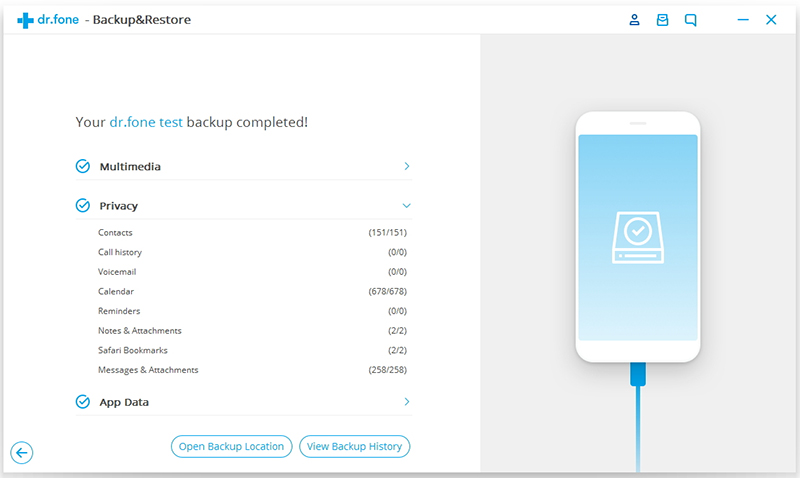
Step 3. View the iPhone backup list on computer
When finished, you will see the button “View Backup History” which uses to see all backup history of several device. The click “View” button enables you to check the inside content. Likewise, you are able to print or export certain files if it is needed.
Currently iOS Backup & Restore supports to restore the Contacts, Messages, Call History, Safari bookmarks, Calendar, Notes, Photos, videos, music, Voice Memo to iPhone/iPad You can either restore these items to device or export them to your PC/Mac.
Step 1. Connect your iPhone to PC/Mac via a USB cable
First, launch this iTunes alternative and select Backup & Restore. Then connect your iPhone to the computer. Finally, choose “Restore”. Or you also can choose View backup History.
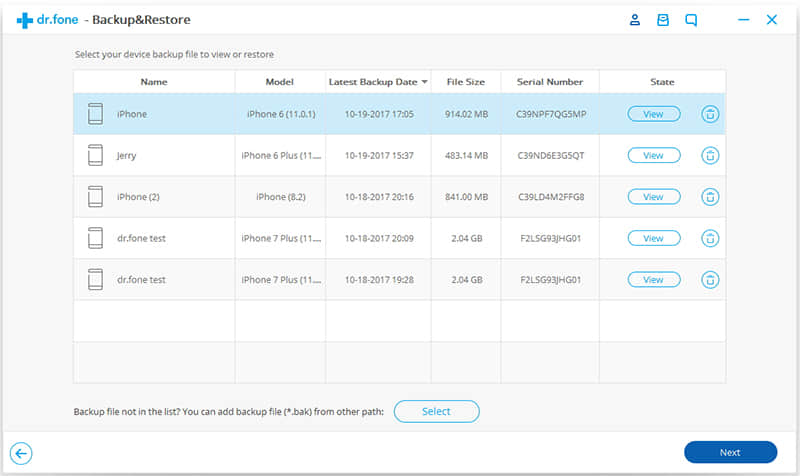
Step 2. Select the previous iPhone backup file
When the backup history emerges, you are free to select the backup file you need. Then if you click on View button next to the backup file, you will see the specific information of the file, and if you choose Next, you will go on the program.
Step 3. View and choose a backup file to restore
After that, this tool will display all data in categories. Now it’s the high time to select specific item to restore or export.
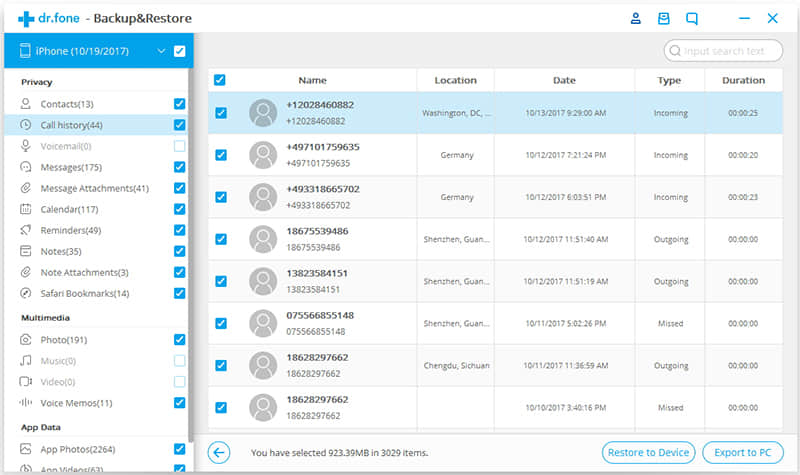
You can restore the files to your device.
When you have selected the files please click on Restore to Device. Just in a few seconds, you will have these files on your iOS device.
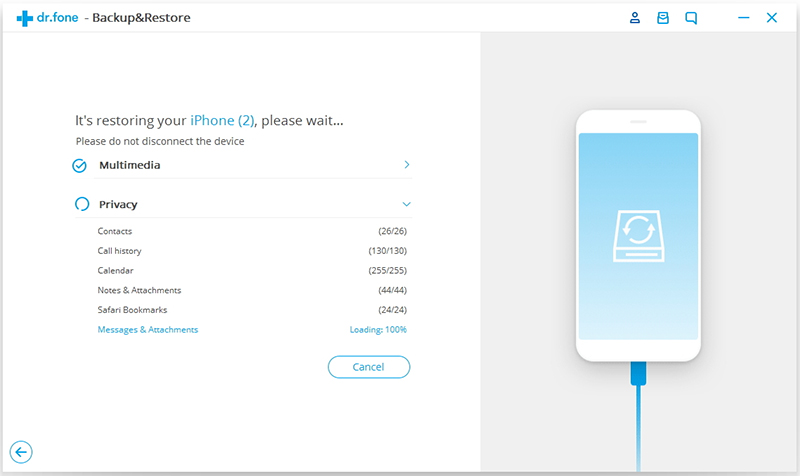
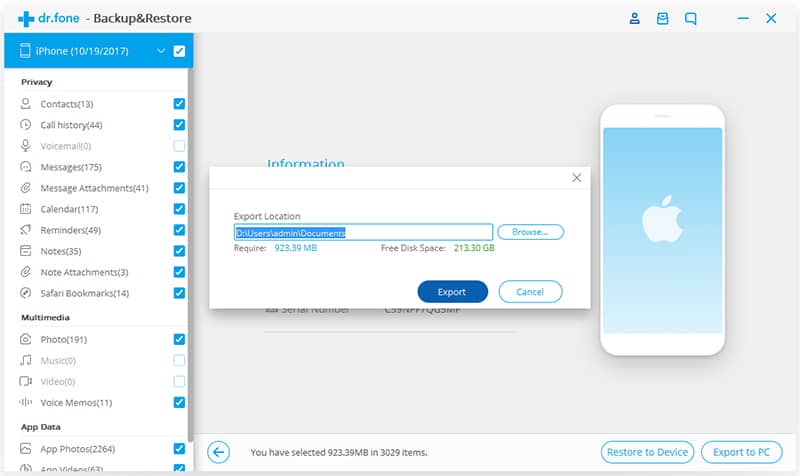
You can export the selected files to your computer.
And here we choose Export to PC. Of course, saving path depends on you.
Now you have learned two methods to backup and restore your iPhone device without iTunes. Firstly, using iCloud to backup is great, but it may take a long time to make a backup online. The other one, FoneCope iOS Backup &Restore is recommended because it not only can backup iPhone at fast speed without using iTunes but also selectively manage iOS data.
Just give it a try now! Welcome to leave a comment if you got any other ways to backup iPhone without iTunes effectively.