"How do I backup my iPhone to my Mac? It says I don't have enough space on my Mac."
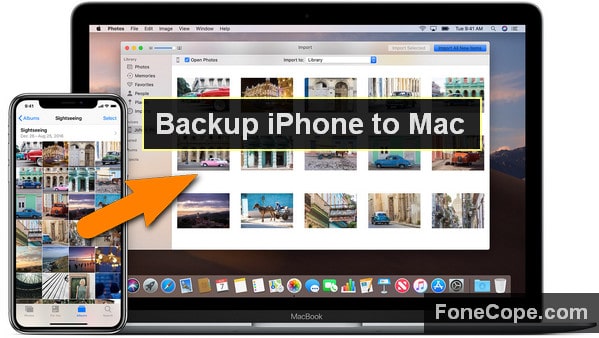
Backing up large amounts of data from iPhone X/XS/XR/MAX/8/7/6/S/Plus to Mac is a huge challenge. It could take hours to sync if you use iTunes. Even worse, sometimes there are weird problems. For example, Mac says that you are out of space but, in fact, the computer has enough available memory.
With these problems in mind, this tutorial focuses on ways that can effectively back up your iPhone to your Mac.
(Note: If your Mac truly does not have enough storage space, it good to back up iPhone to an external device via computer.)
Part 1. Which iPhone Backup Method to Choose?
Part 2. How to Backup iPhone on Mac with iTunes
Part 3. How to Back Up iPhone to Mac with iCloud
Part 4. Easily Backup iPhone to Mac with Fone Toolkit
Tip. Find iPhone Backup on Mac and Move to External Hard Drive
Before you start, let me introduce the features of these ways to backup iPhone to Mac:
iTunes
Pros: iTunes make an iPhone backup on Macbook via a physical USB connection, so it's faster than iCloud.
Cons: It saves all data from iPhone to local Mac in once. If you have a half-full 256 GB iPhone, the free space on your computer may not be enough. In addition, later on, when restoring from iTunes backup, the current data on device will be erased.
iCloud
Pros: iCloud itself serves as a huge online storage platform that supports up to 2TB of storage (5GB of free storage). You can upload data on iPhone and later download them on Mac. Don't worry, it's safe. Because your backups will always be encrypted.
Cons: It takes hours to finish. Much time than using iTunes. That's because it backs up iPhone to Mac over Wi-Fi.
Fone Toolkit - Backup & Restore (iOS)
Pros: A ultimate tool allows you to selectively back up iPhone data onto Mac. That is, instead of all, you can preview and choose some files to transfer. Also, with it, you can preview and extract files from your iTunes and iCloud backup. Moreover, you'll not lose any data when you restore iPhone from the previous backup.
Cons: There ain't no such thing as a free lunch.
There are actually two backup modes in iTunes: automatic and manual. Most of the steps in both modes are very similar except for a few clicks. Next, I'll show you how to use them to backup iPhone to iTunes on Mac.
By enabled this feature, iTunes will automatically make a backup for your iPhone whenever the device is connected on this computer.
1. Use a lightning cable to connect your iPhone to Mac.
2. Run iTunes on your Mac.
3. Click your iPhone icon at the upper left corner in iTunes
4. Locate Settings and click on "Summary".
5. Navigate to "Automatically Back Up" section and click on "This Computer" (as shown in the screenshot).
6. Perhaps you want to set an iPhone backup password. If so, please check the box beside the "Encrypt iPhone Backup" button.
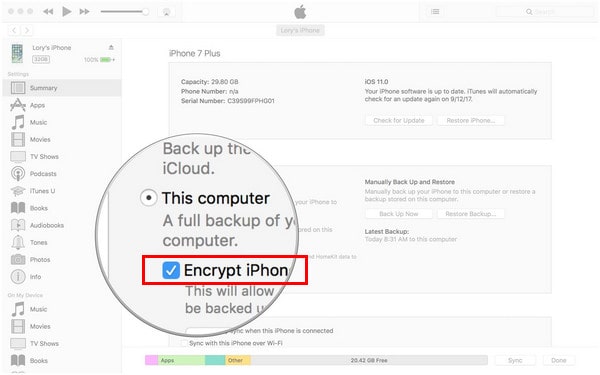
7. Click on "Done" when completed.
In this mode, you just need to repeat steps 1 to 4 in the last part (Automatic Backup), and then continue with the following step 5 to 7.
Step 5. For this time, navigate to "Manual Backup and Restore".
Step 6. Click on "Back Up Now".
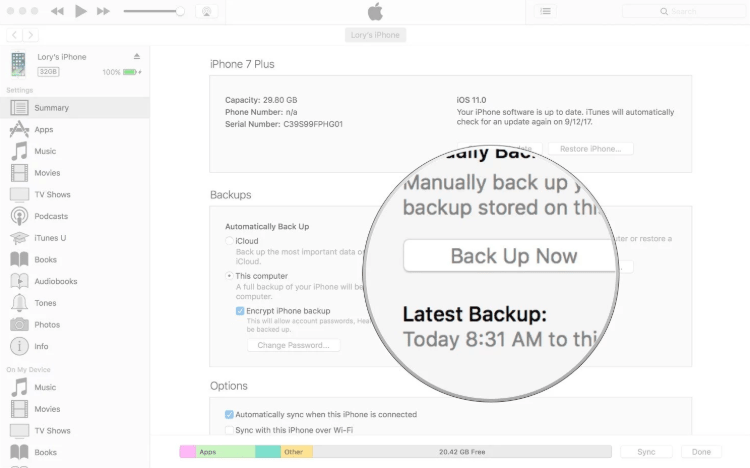
Step 7. Click on "Done" when you finished iPhone backup on Mac.
Although iTunes syncing faster than iCloud, the transfer at times stuck, causing folks ask "how long does it take to backup iPhone to iTunes". And Apple officially says, "it depends."
It seems quite easy to back up device through iCloud. Actually, it does! Now let's see how to use iCloud to backup iPhone to Mac laptop:
Step 1. Ensure your iPhone is connected to a well and stable Wi-Fi network.
Step 2. Tap Settings > "Your Name" > iCloud
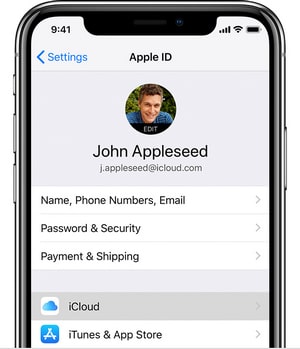
Step 3. If you want to enable automatic backup, switch on the iCloud Backup button. If no, skip to the next step.
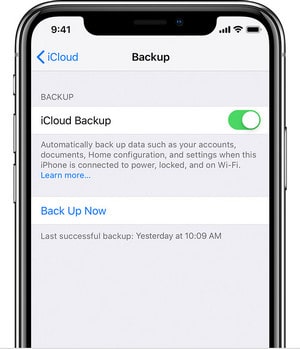
Step 4. Tap on "Back Up Now".
Step 5. Now it's time to download iCloud backup to computer. On your Mac, go to iCloud.com and log in your account
Step 6. Launch the iCloud Drive app
Step 7. Select the file you want to backup to Mac
Step 8. Click on the Download button
Tips for Those Who Enabled iCloud Automatic Backup
you need to:
Turn on iCloud Backup button.
Connect your iPhone to Wi-Fi.
Have adequate available space on device.
Lock your screen with password, pin, or pattern.
Make sure the power is at least 60%.
Have enough iCloud storage (5GB for free; and for other iCloud storage plans, you can choose from a total of 50GB, 200GB, or 2TB).
As you can see from its name, Fone Toolkit - Backup & Restore (iOS) is exclusive for backing up and restoring iOS data. With it, you can simply select the specific backup up you want to restore without any data loss. Further, before restoring, it is also available to preview data in backup, including backup made by Toolkit, iTunes, and iCloud. And it works fast.
Hence, it's perfect for backing up iPhone to Mac.
Step 1. Download and install Fone Toolkit - Backup & Restore (iOS) on your Mac.
Step 2. Launch it. And then connect your iPhone to Mac.
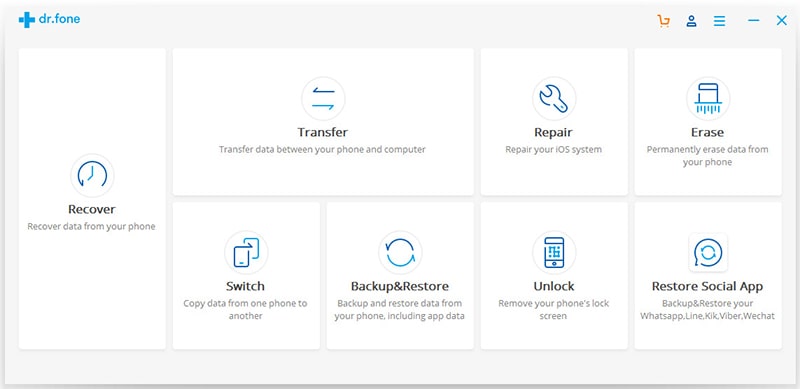
Step 3. Choose "Backup & Restore" option from the home interface.
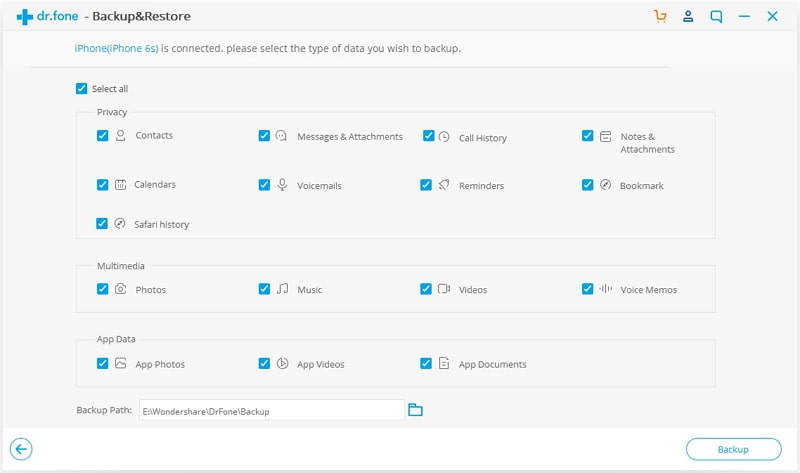
Step 4. Tick the file type you want to back up.
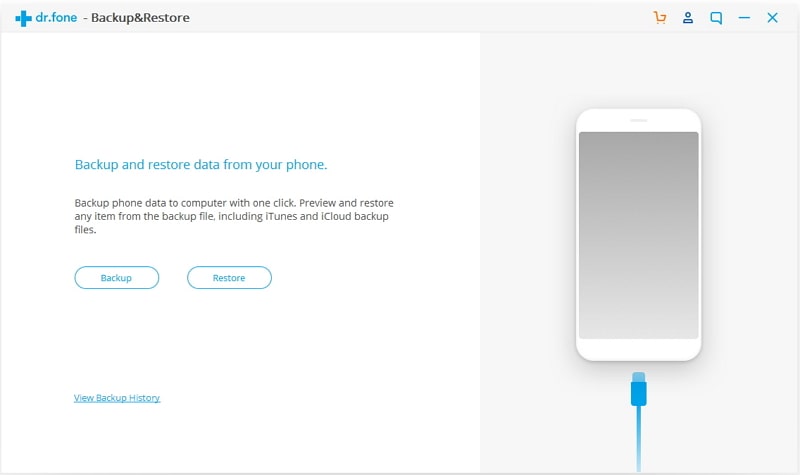
Step 5. The files in categories will be scanned and backed up.
Step 6. The backup file will be stored on your Macbook. Now click on "View Backup History" to see it on Mac.
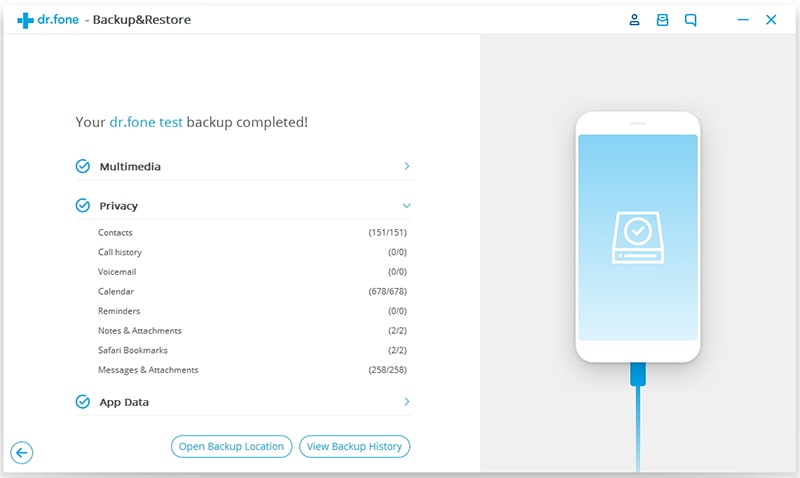
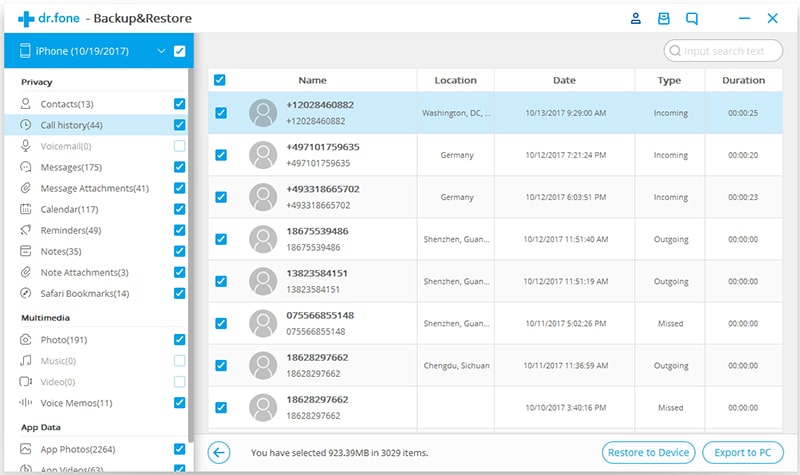
Step 7. You have successfully backed up iPhone on Mac. Now Click on the most recent backup file to check what's in it. You can preview the details, then select some items and click "Export to PC". (For cases that need restore data to iPhone, click on "Restore to Device")
Apart from how to backup iPhone onto Mac, there is another troublesome issue. At times you may want to free up space on Mac, so you need to delete the old iTunes backup file or move the iPhone backup to an external hard drive. But where does it lie?
Fortunately, for general application, all backup is stored in a fixed folder. In Spotlight, you can enter the path:/Library/Application Support/MobileSync/Backup and then hit the "Go" button

If you failed to get the location, there is another way for you to find the iTunes backup on Mac.
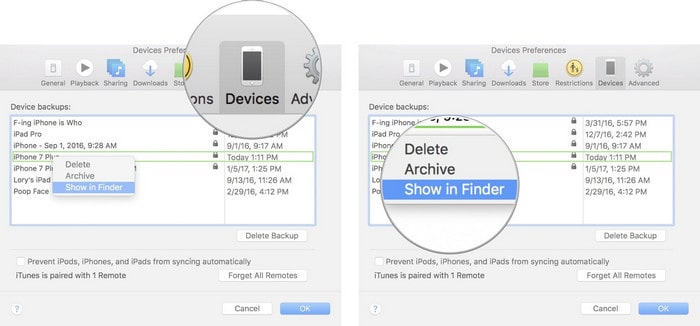
Launch iTunes > in the toolbar, click "iTunes" > in the drop-down menu, select Preferences

Choose Device > select the iPhone > Click on your iPhone while press the Control key > Click "Show in Finder"
Then, how to move iTunes backup to an external hard drive on Mac?
The steps are a little bit complicated. If you're interested in how to do it, please refer to this post about how to move iPhone or iPad backup to external hard drive. P.S., you need to ensure 2 things! The external hard drive's name and the new folder's name.
It would be much easily to move backup data to an external hard drive if you use the feature of Fone Toolkit Backup & Restore (iOS) - "Export to PC".
iTunes can help users back up diverse types of files, including:
1. Local images and videos
2. Contacts
3. Contacts Favorites
4. Messages
5. Calendar (including accounts and events)
6. Notes etc.
Are the above methods clear to you now? Backup iPhone to Mac is an indispensable mission. Granted that you master the solutions this tutorial and keep in your mind, you will circumvent a lot of trouble in the future.
Additionally, to avoid data leakage or loss, it is necessary to ensure that iPhone is backed up safely.
Got any ideas to share with us? Drop your comment in the section below.