SanDisk is a common component for users of electronic products. These mini chips can store such a large number of files for easy portability and use. However, there are a few problems that you may encounter when you use an SD memory card, such as Disk is write-protected, cannot be detected, and won't format etc.
Therefore, this post will provide several SanDisk repair tools for you to make the disk work again.
Part 1. Tips to Repair SanDisk Memory Card When Write-protected or Locked
Tip 1: Unlock Your SD Adaptor
Tip 2. Repair or Change Your SD card
Tip 3. Check Your Mobile Devices Settings
Tip 4. Try CMD window If You are on PC
Part 2. How to Repair SanDisk If Not Detected by PC
Part 3. Fix the Error You Need to Format the Disk in Drive
For the first part, we can check the external settings of the SanDisk. Because of the small size of the SD card, some subtle gadget can be neglected. So we will start at this point.
If you have inserted your SD card into an adapter, please check whether a button on the side is slid up. If so, please slide it down to unlock your SD card.
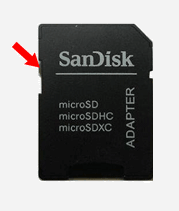
For bigger-sized SD card, a Lock gadget is equipped on it. If the gadget is too loose to fix, you need to repair it (subject to the valid repair warranty) or change it into a new one.
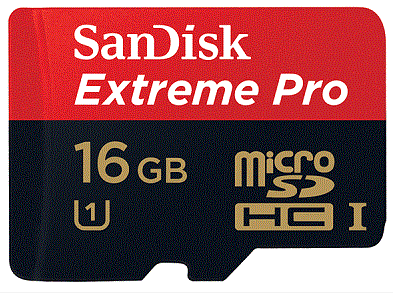
Apart for the above tips, you can go to check your device's settings whether you have locked your card, please figure out the mobile device manufacturer, and follow professional instructions when you are checking your settings.
If you have a Windows PC, we can try an inner path to unlock your write-protected SD card. As a SanDisk repair tool, CMD window can connect to your system settings, but the process is a little bit tricky, so remember to cautiously follow the steps.
Noted: This method will erase all data on your SD card, so be sure to back up your data before using this way.
Step 1. Press "Win + R" to and tap on "Enter" to open CMD window.
Step 2. Input "diskpart" and tap on "Enter" to get into diskpart.
Step 3. Input "list disk" and hit "Enter".
(Before the next step, please get the number of SD card in your PC.)
Step 4. Input "disk 6" (6 is the number of my write-protected SD card.) and hit "Enter".
Step 5. Input "attributes disk clear read only" and tap on "Enter".
Then the CMD window will subsequently remove the write-protection from your SD card. When the progress finishing, close the CMD window.
Another cause for the failure to read an SD card is a corrupted registry entry. Therefore, to make your card readable again, you can try to remove the registry keys that have been set after the installation of your SD card.
1. Disconnect your SD card from your PC.
2. Open Regedit.
For Windows XP: Get Start > Run > Type "Regedit" > click on OK
For Windows 7, 8 and Vista: Go Start > Type Regedit into the search box > Enter
For Windows 10: Find "Search the web and Windows" box > type Regedit > select "Regedit – Run Command"
3. Locate at registry list and choose File and then Export.
4. Denominate the file as SNDK.reg and save it to your desktop.
(Noted: If you fail amid the process, you can go back and try from step 1 to 3 but select "Import" instead of "Export" and then choose SNDK.reg file to allow it to be imported, then go to restart your PC.)
1. Choose "Edit" > "Find" from the registry list.
2. Input VID_0781 and click on "Find".
3. After the detection, right click on the selected registry key and choose "Delete".
4. Press F3 to detect another registry key with VID_0781.
(Do not delete other keys other than VID_0781 or your PC may be a disorder or your registry entry will be damaged.)
5. Repeat the above process until no search result appears.
Noted: For Windows 7,8 and Vista users, some registry key may be prevented from being deleted. If so, skip this step and continue.
6. When all VID_0781 have been deleted, reboot your PC.
7. Plug your SD card into your PC, and your SD card will be installed again.
SanDisk Format Utility on your PC does help to use your SD card again. When a prompt of "You need to format the disk in drive" shows up, plug your SD into your PC and follow the instructions: (Before doing this, back up all the files in your SD card.)
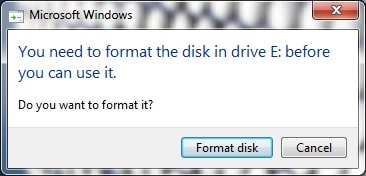
1. Choose "Cancel" to close the prompt.
2. Click on "Start" > "My Computer"
3. Choose to open the Drive letter that the message pointed out.
If you can enter the drive, back up all the files in it and then format the drive and pasted all the files back to it.
If the message pops up again, try another USB port. If it works, the former port may be damaged; if not, back up the files and format the drive and pasted the files back into it.
If the message still shows up, you need to use another tool to recover the files or you can directly format the drive if nothing important in it.
If your SanDisk memory won't format and you don't want to try the risky format way, then running Diskpart would be your friendly SD card repair tool.
1. Press "Win + R", Enter it and input "cmd" to open CMD window
2. Input "diskpart" > Enter > type "list disk"
3. Input "select disk 6" (the number based on your own disk number)
4. Input "clean to run the clean utility"
(All data and files will be clean out in this step, please back up in advance if necessary.)
5. Input "create partition" to create a new partition on your SD card.
6. Input "select partition 0" (the name of the new partition)
7. Input "active to make the partition active"
8. Input "format fs=ntfs" or format fs=fat32 to format the partition
If you want to recover lost data from your SD card when it is corrupted or formatted, you can try a Micro SD card repair software.
FoneCope AnyRecover, which serves as a SanDisk SD card recovery tool as well.
Noted: Do not save your recovered files to the external device where you lost them.
Step1. Download and Launch the SanDisk Tool
Download AnyRecover from its official website and install it on your PC, then launch it.
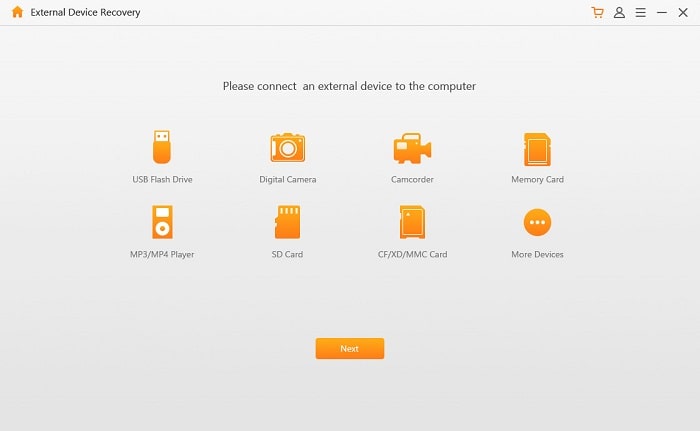
Step2. Select External Device Recovery Mode
Select "External Device Recovery" mode with a USB icon.
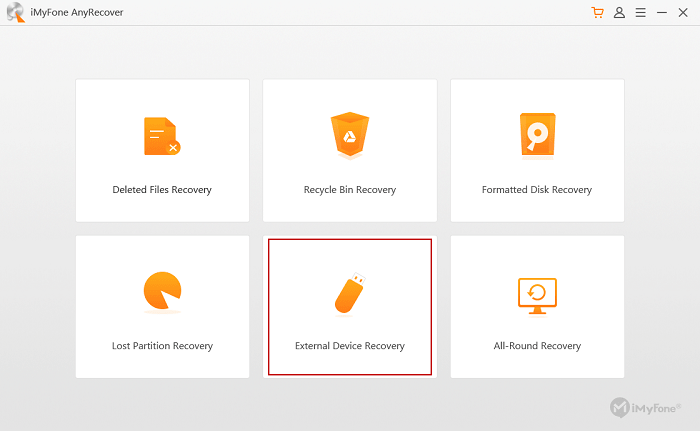
Step3. Plug and Connect SD card to computer
Plug your SD card into your PC and then choose "SD Card" section and go "Next".
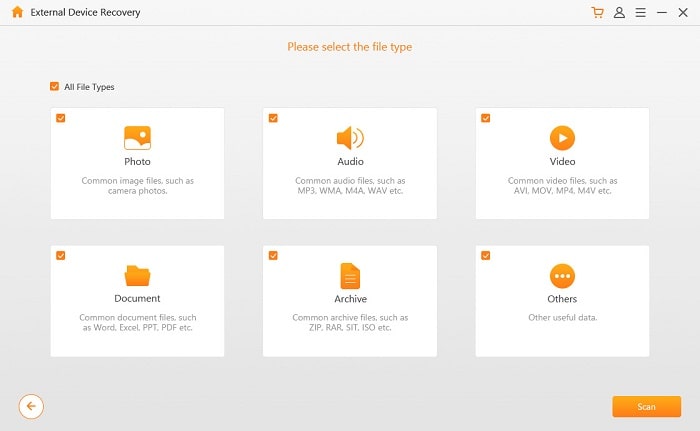
Step4. Select Partition and File Type to Scan
Form the list you get, choose one disk and then the file type you want to recover, and then go "Scan".
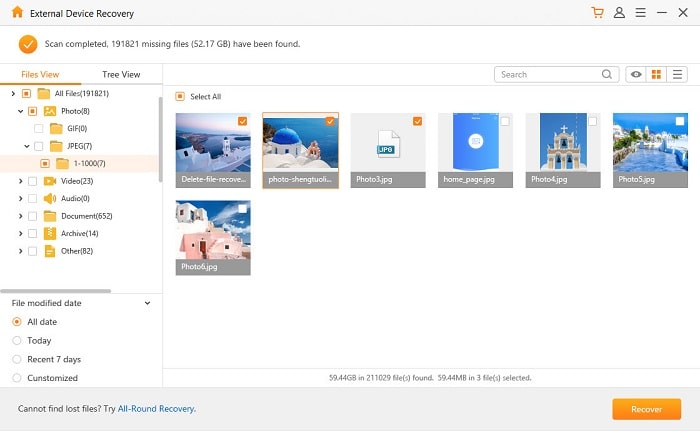
Step 5. Preview and Recover Lost Data from Micro SD Card
The software will scan the designated files on the pointed partition, then the files will show up, preview the files to check and click on "Recover" if nothing goes wrong.
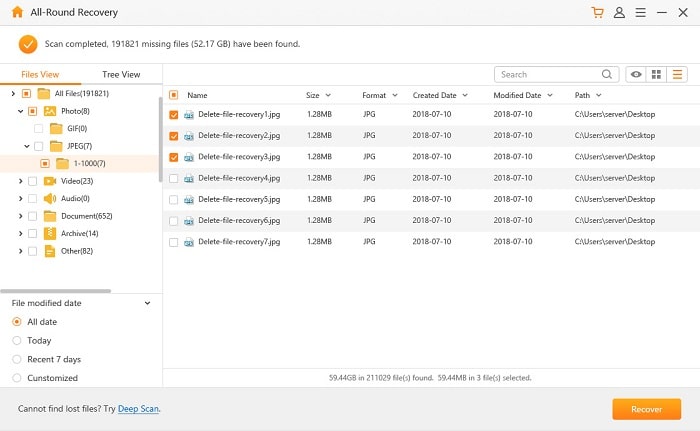
Step 6. Choose All-Round Recovery to Scan One More Time
If the file list does not contain any files you want, you can go back to the mode selection and choose "All-Round Recovery" mode to go through the above steps again.
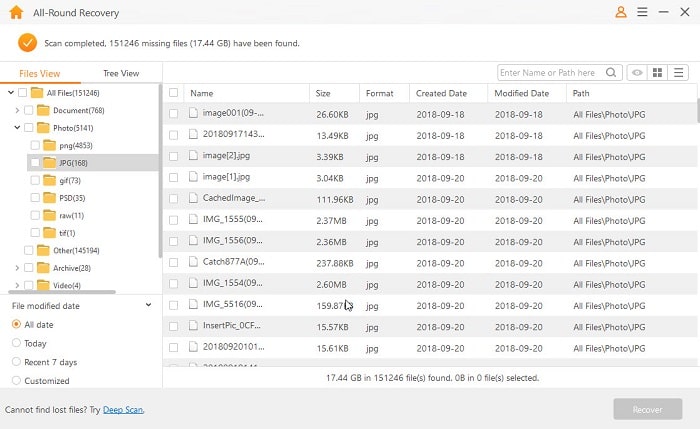
Step7. Preview and Recover Data from SanDisk Card
Similarly, after the scan progress, you can get a new list of files under all-round mode, preview the files and click on "Recover".
In addition, you also can use it to recover deleted files on Mac and PC.
Here you can find more effective tools for SD card recovery.
So that's all for SanDisk repair tools and tips. Even if the methods mentioned are useful, the first you need to ensure is that your SD card is in good condition. Because reading a corrupted SD card is really hard work and even cannot a success if your repair device is not sophisticated.
Cautiously, when trying these methods, remember to back up your important files or information in case that your device may get disorder or malfunction.
Anyway, thanks for reading this post, if you still have any question, contact us and we will reply to you soon.