"Is there any way to recover deleted photo on Mac? I removed 2 GB of useless photos from Macintosh (mostly family pictures) but accidentally deleted work-related captures. Urgently, I want them back."
The proportion of Mac in life is getting heavier and heavier. In particular, its huge storage space can save many videos and photos that are synced from iPhone/iPad. When these valuable photos are accidentally deleted, you must be frightened and anxious.
Now, here check useful methods to recover deleted photos Mac in this article.
Part 1. Retrieve Deleted Photos on Mac from Trash Bin.
Part 2. Recover Deleted Photos from iPhoto Mac.
Part 3. Perform Photo Recovery Mac using Time Machine.
Part 4. How to Recover Permanently Deleted Photos from Mac? (Most Efficiently)
"Where do the deleted photos go on mac? How to find deleted photos on mac?" These problems occur immediately after you accidentally delete photos. The obvious Trash Bin on Mac desktop naturally becomes your preferred location for retrieving photos.
Step 1. Double-click the "Trash Bin" icon to open it quickly.
Step 2. Search for the pic you want to restore in Trash folder that appears.
Step 3. Click on the found photo and drag it onto your Mac. Or right click and select "Put Back" to save the photo to its original location on Mac.

Tip: Trash folder is automatically emptied every 30 days. For recovering trash on Mac, you need to act quick.
If you have recently deleted photos on Mac from iPhoto, you can also recover them from your "Recently Delete" album. However, its default setting will also automatically clear up the album for 30 days.
Step 1. Open iPhoto.
Step 2. Select the "Recently Delete" album in the main window of the app.
Step 3. Preview each photo to confirm the target photos, then click "Recover".
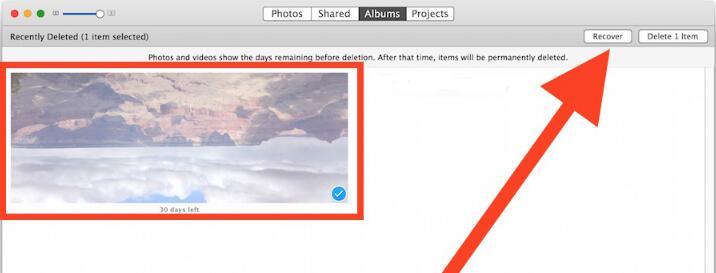
Tip: iCloud is not enabled on Mac when deleting photos, otherwise the delete operation will be synchronized.
If you can't find target photos in these two locations, it's a good idea to use a backup to recover deleted photos on Mac. Since most people use Time Machine to sync files, I'll describe its detailed steps below.
Step 1. Restart your Mac.
Step 2. When starting the CD wakeup, hold down the "Command + R" simultaneously to enter "Utilities".
Step 3. Select "Restore from Time Machine Backup" from the list and click "Continue".
Step 4. Click Continue on the Restore System page.
Step 5. Select the appropriate Time Machine backup and click "Continue".
Step 6. Click on the latest backup of your Mac drive and click "Continue".
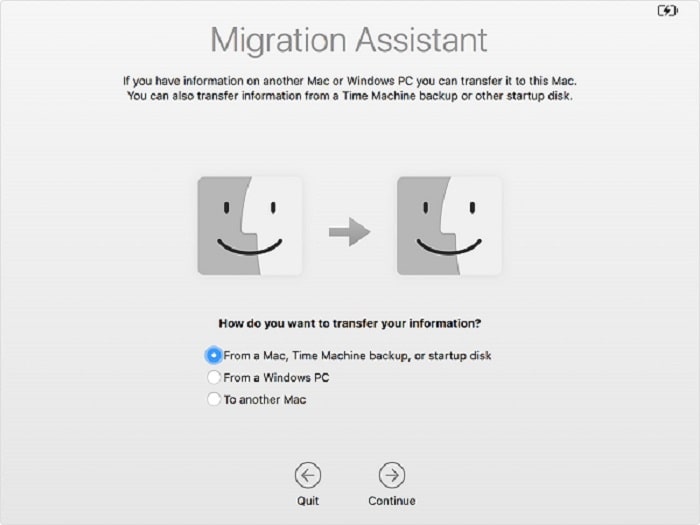
Tip: check the steps to recover photos from local and cloud backup in the link below.
If the above methods are difficult to recover deleted photo on Mac, this method is the best option. It allows you to retrieve lost photos efficiently and quickly with FoneCope AnyRecover, even if it has been permanently deleted.
AnyRecover is a pro photo recovery software for Mac that combines a variety of scientific detection and recovery technique to find hidden photos and retrieve them in just a few clicks, like:
recover deleted photos from SD card
recover lost pictures from hard drive
And it supports different versions of Mac. Here is how to recover:
Step 1. Select Recovery Mode
Download and launch AnyRecover on Mac, then select "Deleted File Recovery" mode on the main interface.

Step 2. Select a Browsing Location
Mark any photo location directly or click "Browse" to ensure a more accurate location, then select "Next".
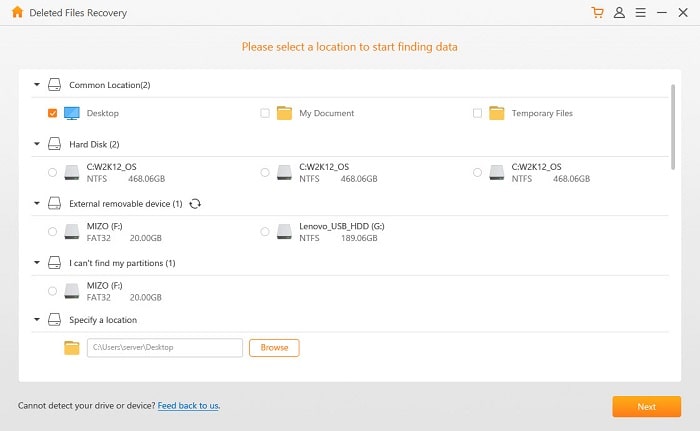
Step 3. Confirm File Type
Select the "Photo" you want to restore from file types"Photo, Audio, Video, Document, Archive, and Others", then click "Scan".

Step 4. Scan the Device
AnyRecover will start a quick scan based on the previously selected mode, location and type. After that, the results of all deleted photos will be displayed.
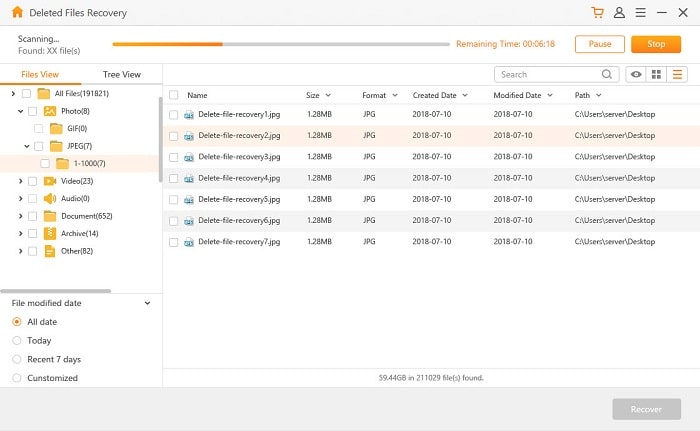
Step 5. Preview and Restore
Preview and view all the items to confirm which photo to restore, then click "Recover".

Not only can it undelete photos, but it can also recover unsaved PPT Mac, restore unsaved Excel on Mac and retrieve Word document on Mac.
After the delete operation, the file still exists on Mac, just marking the disk as writable and waiting to be overwritten by time. So, any new action may cause you to reuse that portion of the disk. If you find that you have lost important photos, stop using the device immediately, which will greatly improve your photo recovery rate.
This article introduces 4 ways of recovering deleted photos on Mac. Browsing and viewing the Trash Bin, iPhoto's "Recently Deleted" album and Time Machine backup is the most common methods. But for those who often clean up files and have no backup, these methods are not very friendly. I recommend the last photo recovery for Mac plan with FoneCope AnyRecover. It can throw away the reasons for photos loss and recover them from Mac quickly and efficiently.
You may have some questions about photo recovery Mac. Just contact us in the comments section.