Most likely you'd like to transfer photos from iPhone to computer to save when the pictures take up a large part of the storage space. But iTunes and iCloud do not make it easy to organize, compare, and delete images before you get photos off iPhone. So, is there an easy way to import photos from your iPhone to computer?
Here are 8 methods for you to transfer pictures from iPhone to PC, and firstly please check the comparison table.

As you can see from the above comparison table of 5 methods, this post is going to show you 8 effective solutions transferring photos from iPhone to PC, including AutoPlay (Win 7), Photo App (Win 10/8), Google Photos, Dropbox, FoneCope Phone Manager, iTunes, iCloud and Explorer. Now please check the details in the following parts.
(Note: The free online backup photo service has space limitations and charges will be exceeded if it is out of range. More importantly, personal privacy cannot be guaranteed.)
Part 1. How to Transfer Pictures from iPhone to PC (Windows 7)
Part 2. How to Import Photos from iPhone to PC (Windows 8/10)
Part 3. How to Upload Photos from iPhone to PC (Google Photos)
Part 4. How to Move Photos from iPhone to PC (Dropbox)
Part 5. How to Copy Photos from iPhone to PC (FoneCope)
Part 6. How to Sync Photos from iPhone to Computer (iTunes)
Part 7. Upload to iCloud Photo Library and Download to PC (iCloud)
With Windows AutoPlay, you can easily import photos from your iPhone to Windows 7. You only need to open photos or other different types of content, such as music and videos on different types of media. When you plug in iPhone via USB, AutoPlay should pop up automatically on Win 7.
1. Enable AutoPlay on PC: Click the Start Menu > Control Panel > Search for AutoPlay > AutoPlay > Turn on "Use AutoPlay for all media and devices"
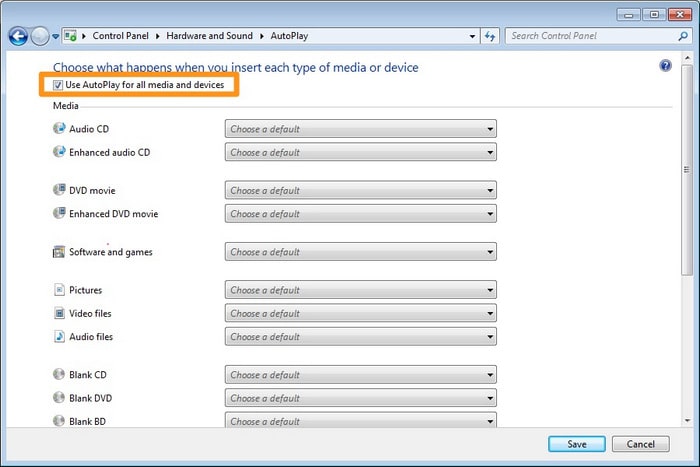
2. Connect your iPhone to PC
3. Select "Import photos and videos", then a collection of photos will come out. Just click "Import" to transfer these photos to your PC Windows
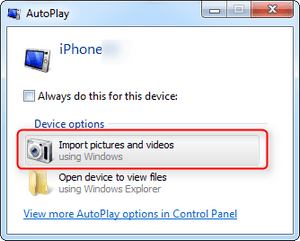
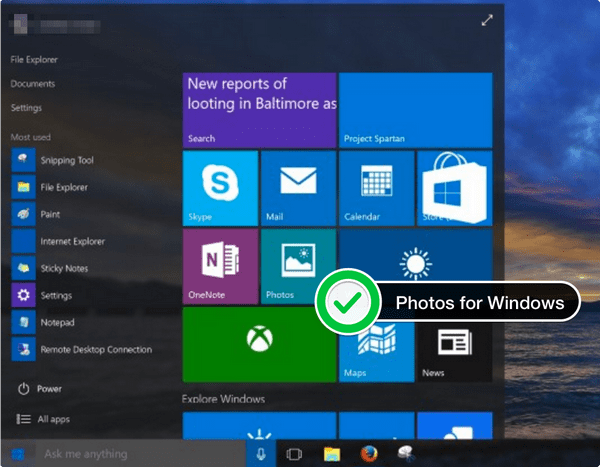
You can use Photos app on Win 8 to get photos from iPhone to Win 8. Besides, it also allows you to collect, view, and edit your photos/videos in the Photo Gallery as well as OneDrive.
1. Connect your iPhone to your PC Windows 8/10 > Open Photos app > Scroll down to the bottom > Click Import.
2. Choose the iPhone you want to import your photos from.
3. Now Photos app will automatically search for all photos and videos shooting on your iPhone. So, you can click Select all to get/take photos off iPhone to PC Windows 8/10 at once.
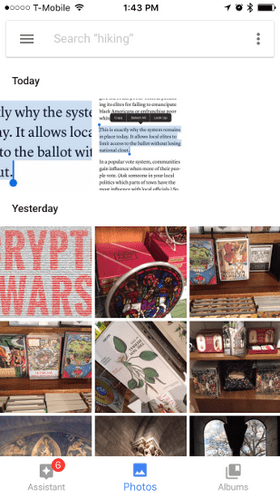
Google Photos is a free program that you can download from the iTunes Apple Store. It helps users back up photos without restrictions. These photos are stored in Google Google DriveFree in the iTunes Store and synced across all registered devices. Now just take a look at the steps on how to use Google Photos to download photos from iPhone to PC.
1. Sign into a Google Account, then you can also switch among multiple accounts to get started.
2. You can find your pictures quickly by the fast-scrolling button to see all your recent snaps, then you can download them to your PC.
Dropbox is a cloud service which allows you to transfer pictures from iPhone to PC.
1. Create an account for your Dropbox, then open the Dropbox app on your iPhone and upload the photos in your iPhone.
2. Open Dropbox on the PC and sign in with your account on your iPhone, then you can download the pictures you just uploaded from your iPhone.
However, Google Photos or other online backup services can help you easily backup photos, but they still have the restriction of space, which can't offer unrestricted unlimited storage for free.
Google Drive: It has only 15GB available for free users and offers a terabyte of storage for $9.99 per month.
FlickrFree: It can offer automatic photo backup and an entire terabyte of free storage, which is more than enough for the average user—enough, indeed, for 200,000 regular iPhone photos.
DropboxFree: It will offer photo backup with only 2GB of free storage, and OneDrive does the same, giving 5GB for free.
This program is specifically for the iPhone data transfer feature, because iTunes and iCloud are really not enough to manage data. As for the images, FoneCope Phone Manager has 2 modes for you to import pictures from iPhone to computer.
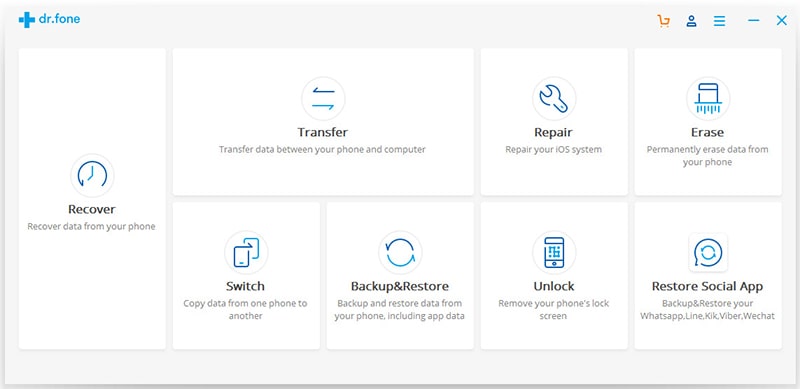
Step 1. Install this program on Your PC Firstly, you need to download and run it on your computer. And then you should connect iPhone to the computer via USB cable directly. After that, click Transfer in the main window.
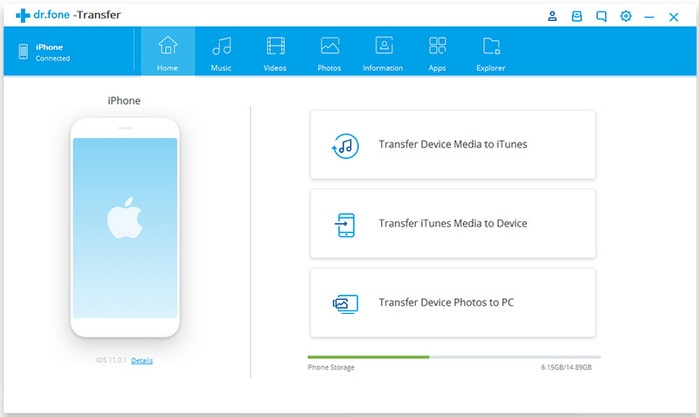
Step 2. Click "Transfer Device Photos to PC" option.
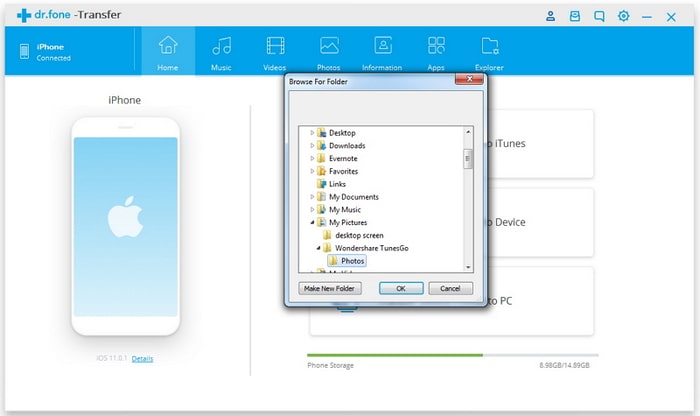
Step 3. Browse for folder and choose one to store your iPhone pictures.
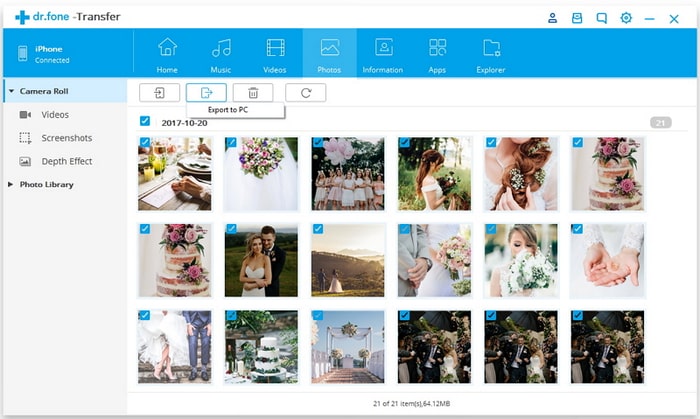
Step 4. Now check the thumbnail and mark the items you want to copy from iPhone to computer. And then you can click "Export to PC" and wait for a few minutes.
This software can fully improve your iPhone experience. With this tool, you can manage your data more quickly and securely. In addition, you can not only import pictures, but also transfer other media file types at fast speed without iTunes.
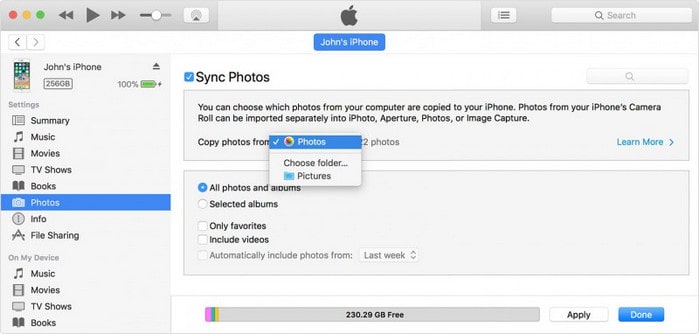
When you connect your iPhone to computer using iTunes to transfer pics, iTunes will automatically sync your iPhone photos to PC. Please note that iTunes will skip duplicates, only copying pictures that are on device but not on your computer. If your photos on iPhone won't sync with iTunes, you can refer the article.
1. Download and install iTunes on your PC.
2. Run iTunes and then plug iPhone into computer via USB. After that, locate the top on iTunes interface and click the device icon.
3. On the left, find "Photos" in control panel. And then, tick the "Sync Photos" box.
4. Choose "All photos and album" > "Apply".
Click "Done" when the transfer process completes.
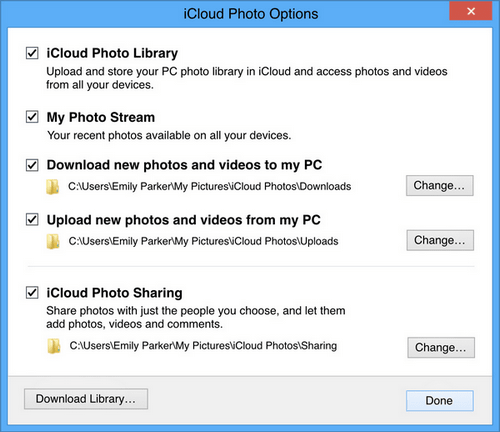
iCloud Photo Library can store all your photos in iCloud just as you would on a PC/Mac. Once iCloud Photo Library is enabled on the iPhone, the photos will be uploaded from iPhone to iCloud, so later you can download images from iCloud on your PC.
Step 1. Download iCloud for Windows, then install it on your PC.
Step 2. Sign in with your iCloud account.
Step 3. Choose what you want to sync, and check Photos, then next to the Photos, click on Options.
Step 4. Enable iCloud Photo Library, and click Done, then click Apply.
Step 5. Open a File Explorer window, click iCloud Photos.
Step 6. Click Download Photos, so you can choose the photos you want to download from iPhone to your PC.
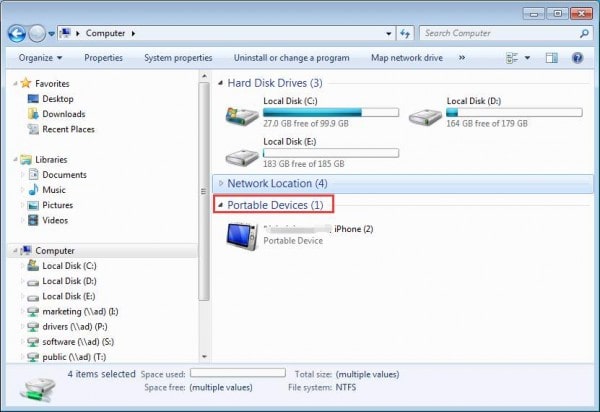
It is also possible to transfer photos from iPhone to computer using the Windows Explorer.
1. Connect iPhone to PC via USB.
2. unlock iPhone and tap "Trust" button to trust your computer.
3. On PC, go to My Computer and find "Portable Device"
4. Open the device storage, find "DCIM". All the photos are saved in this folder. You can drag and drop photos from iPhone to computer with ease.
All in all, you can easily transfer photos from your iPhone to your PC in 8 ways. Now simply select the way you like to easily copy photos from your iPhone/iPad/iPod to computer with or without iTunes.
Feel free to leave a message below if you have any suggestions or questions. Welcome to share this article with your friends if it is useful to you.