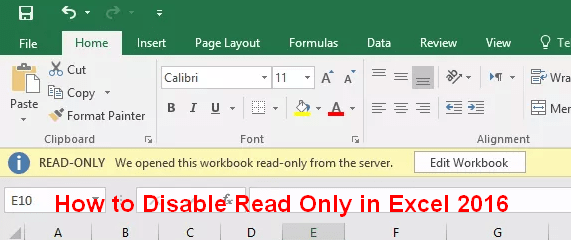
Read-only mode is a guarantee to prevent others from modifying Excel 2017/2016/2013/2010, but it becomes an obstacle to editing and modifying Excel files when not needed.
In this article, I'll cover 6 ways to disable read-only in Excel 2016 in different situations.
Part 1. Enter Password to Access Excel:
Part 2. Workbook Is Marked as Final:
Part 3. Recommended to Access Excel in Read-only:
Part 4. Worksheet/Workbook Locked as Read-only:
When the warning message pops up, you must type a password to access Excel 2016. If you remember the password, it is easy to remove read-only from Excel. Please check the 2 methods.
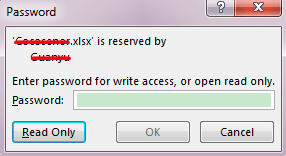
Step 1. Open the password-protected Excel 2016, then type the correct password and click "OK".
Step 2. Click the "File" button and select "Save As". You can change the file name or address here.
Step 3. Select "Tools" on the dialog and select "General Options" from the drop-down list.
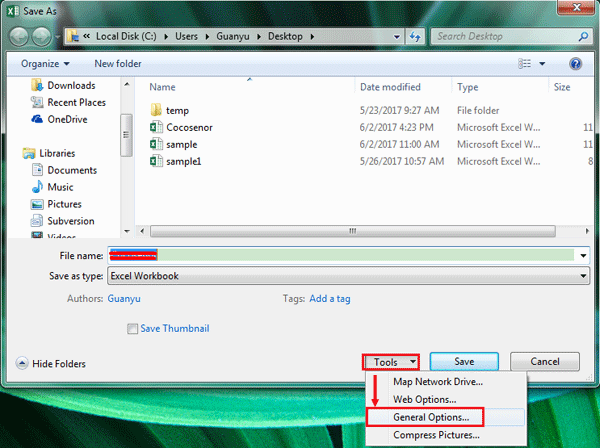
Step 4. Delete the password in the box that appears, and then click "OK".
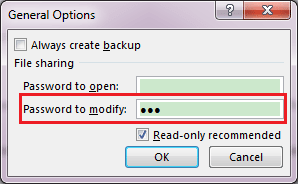
Step 5. Finally, in the Initial "Save As" dialog, click "Save".
Step 1. First, select the "Read Only" button to open the Excel file.
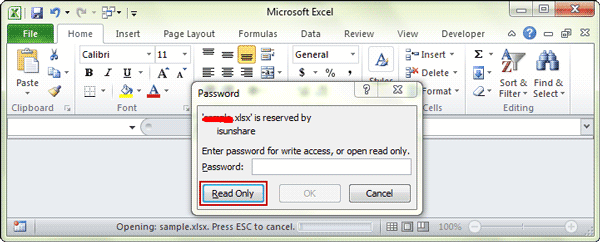
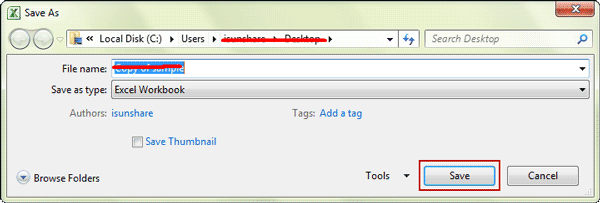
Step 2. Select "File" in the menu bar and select "Save As" from the drop-down list.
Step 3. Change the saved file type and click the "Save" button.
Step 4. Click "OK" to save the Excel as a non-read-only file.
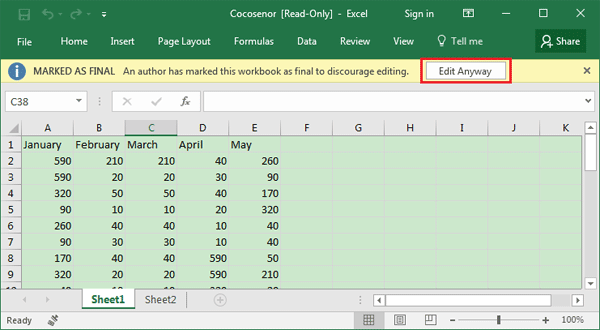
This method can be used when the yellow warning bar labeled "Marked as Final" is below the menu bar. In this case, it is easy to disable read-only in Excel Mac/PC, just click "Edit Anyway".
Step 1. Open the Excel file with a read-only password.
Step 2. Click "Edit Anyway" under the menu bar to edit the Excel file.
When the image below appears, you can only open it as read-only. How to clear the read-only password of the Excel 2016 after opening? There are 2 ways to give you inspiration.

Step 1. In the Excel file, click "File" in the upper right corner, select "Save As", and then click "Browse" in the interface.
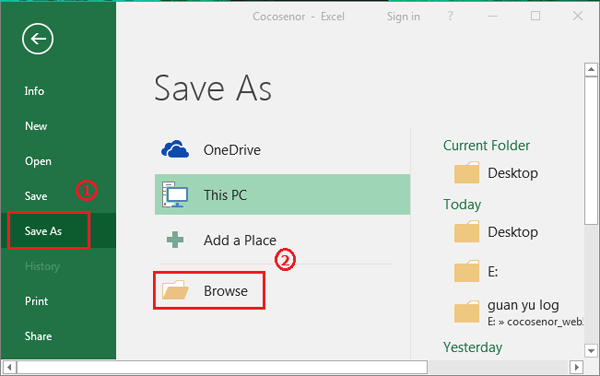
Step 2. After that, click "Tools" below and select "General Options" from the sublist.
Step 3. You can see the "Read-only recommend", uncheck it, and then click "OK".
Step 4. Click"Save" in the "Save As" interface.
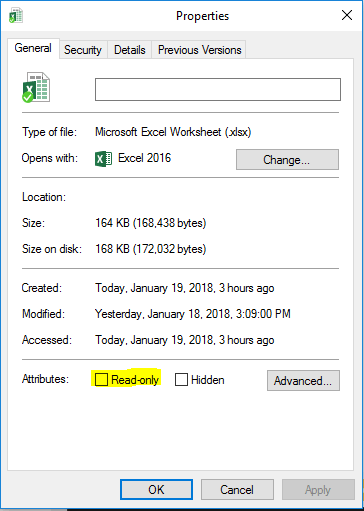
Step 1. Press "Windows icon + E" on the keyboard to open "File Explorer".
Step 2. Locate and right-click the Excel 2016 in the "File Explorer" and click "Properties".
Step 3. Navigate to "Attributes" in the pop-up Properties window.
Step 4. Remove the "Read-only" check mark under the "General" tab.
Step 5. Click "Apply" and then click "OK".
You may wonder how to change Excel from read-only when Excel 2016 is locked to "read-only" due to Worksheet/Workbook protection. When the following pop-up message appears, you can confirm that you need to remove the "read-only" limit.

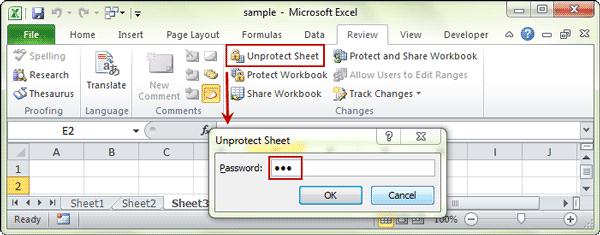
For Worksheet
Step 1. Open the Excel file.
Step 2. Go to the "Review" tab and click "Unprotect Sheet".
Step 3. Enter the correct password as needed to cancel the worksheet structure lock.
Step 4. Click the "Save" button to disable Excel read-only.
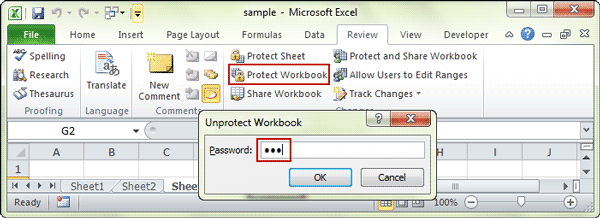
For Workbook
Step 1. Similarly, open Excel 2016 and click "View".
Step 2. Click "Protect Workbook" to display a box called "Unprotect Workbook".
Step 3. Enter the appropriate password and click "OK".
Step 4. Click the second icon "Save" in the upper left corner. Now you can change Excel from read-only.
As we have seen, except for #2 and #4, other methods require a password to get the operation of removing read-only on Excel done. The password is the soul of the operation and is essential.
Now let me introduce a reliable tool - Password Genius to retrieve passwords which can recover lost excel password within minutes.
1. It is a one-stop tool for Excel, Word, PowerPoint, Outlook, RAR, PDF, ZIP password recovery.
2. You can quickly remove password from Excel without losing data.
3. Also can remove password from Word document in a few steps.
4. Built-in advanced algorithms and unique scan technology allow you to retrieve passwords faster.
5. Password Genius free can recover up to 3 characters of password.
How to Change a Read-only File in Excel? If you want to change it, you must first access the file with password and then disable the read-only.
Now, I will show you how to retrieve the lost password. As for disabling read-only, you can check the 6 methods above.
Step 1. Download the Password Genius to PC/Mac
Step 2. Go to the "Recover Passwords for Files and Archives" mode and select "Excel Password Recovery".
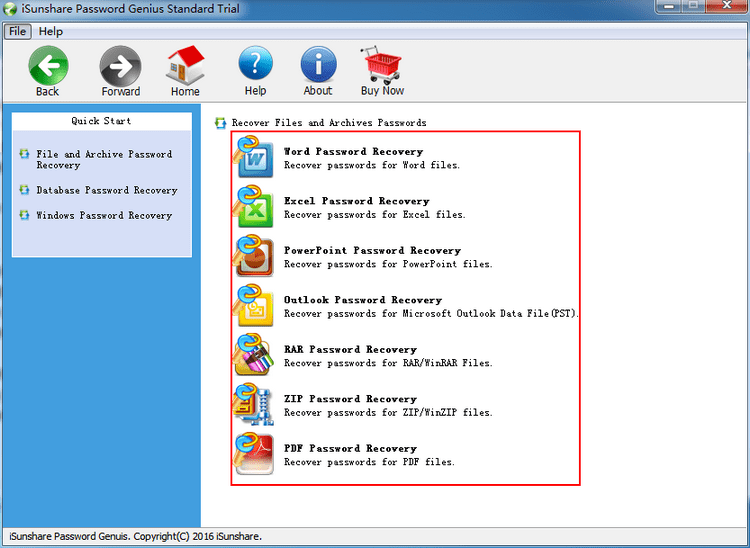
Step 3. Click the "Open" icon on the left to open the Excel file to recover password.
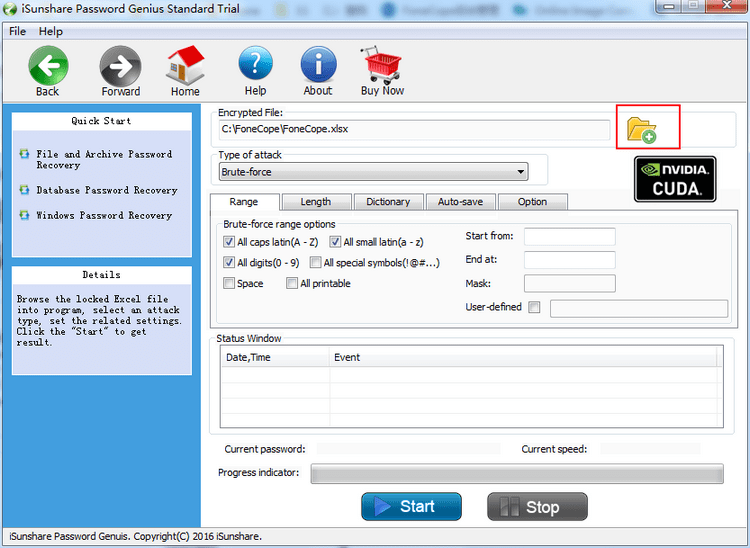
Step 4. Select the attack mode from "Brute-force", "Mask", "Dictionary" and "Smart" and set the recovery options, and finally click the "Start" button.
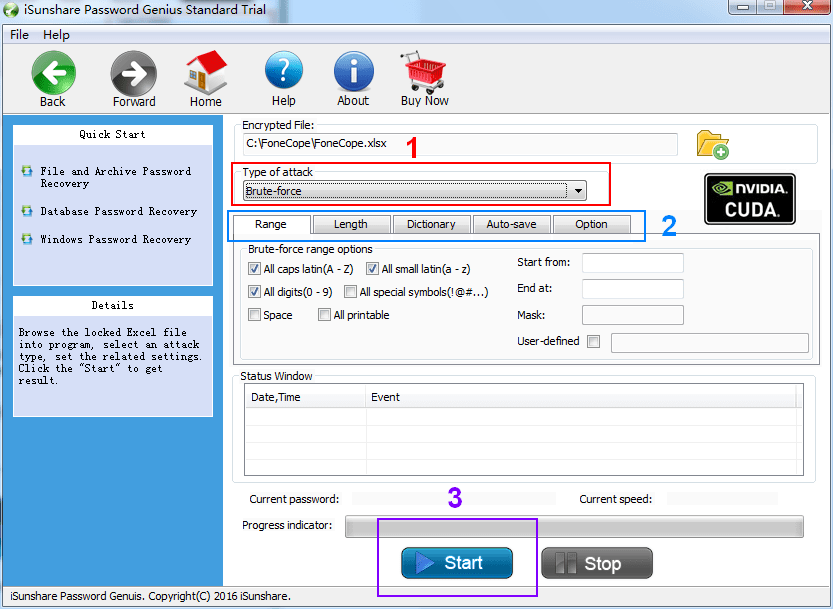
The tool that can also disable read-only in excel 2016 is PassFab for Excel. When you receive "Read-Only Recommended", it provides three modes that can easily unlock excel in a few minutes. The next time the same happens, you don’t need to worry anymore.
Sometimes, at work, you also need to put the Excel file in a "read-only" state, which I will briefly introduce here.
Step 1. Find and click the Workbook you want to lock in the "Finder".
Step 2. Select "File" in the menu bar and then select "Get Info".
Step 3. Check the "Locked" checkbox under the "General" tab.
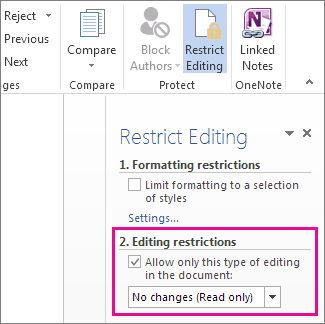
Step 1. Under the "Review" tab, select "Restrict Editing".

Step 2. Mark the "Allow only this type of editing in the document" checkbox and make sure "No changes (Read only)" below it.
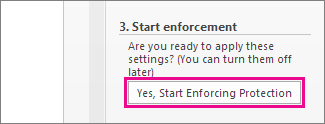
Step 3. Scroll down the list and select "Yes, Start Enforcing Protection"
This article introduces 6 methods on how to disable read-only in Excel 2016, each with a different applicable scenario. Choosing the right one for your situation is the key to solving the problem. It also describes the ways to disable read-only without password and put Excel in read-only mode, which let you get to know more.
Please leave your feedback in the comments section below.