A great attraction of Kik that distinguish it from other instant messaging applications is its anonymity. To register for the Kik account, a user must enter a first and last name, e-mail address, and birth date ( the user is must at least 13 years old), and pick a username. The registration process of Kik doesn’t request your phone number. That one feature made it stand out of the crowd and became the best and most suited app for teens across the world. As of May 2016, Kik Messenger had about 300 million registered users, and United States teenagers users occupy about 40%.

Next, we are going to show you why and how to deactivate Kik account:
Part 1. Reasons to Deactivate Kik
Reason 1. Someone is Bothering You
Reason 2. You Need a Break from Instant Messaging App
Part 2. The Differences Between Temporary and Permanent Deactivation of Kik Account
Part 3. Two Methods to Deactivate Kik
Deactivate Kik Account Temporarily
Deactivate Kik Account Permanently
Someone sends you unwanted naked photos or any other graphic pictures or symbols of an adult nature. What is completely intolerable is that they keep doing so even if you have warned them to stop.
Someone ceaselessly ask you for personal information. If someone always sticks their nose into you personal info that may lead to identify you, you should pay more attention to them and be alert.
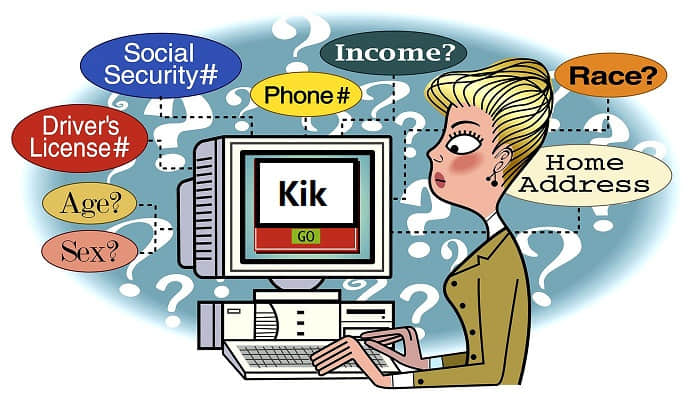
Someone is aggressive and dangerous. Online bullying is real and we should all be aware of it. Bullying cannot be tolerated. So you want Kik deactivate account for you.
Another reason that some people consider deactivating their account is because they may need a break from the Kik Messenger app. For example, you have a test coming up, or you are preparing for something important that you can’t be distracted. There may come a time when you are tired of communication and need a break from the social media so you want to deactivate Kik account. How to deactivate Kik account? Read on to find out.

Once you temporarily deactivate your account you will not get any message from your Kik anymore.
The username which you created for your account is no longer searchable.
Your name will be deleted from the people with whom you contacted to.
You can reactivate your Kik account with your email and password registered with your Kik account.
If you forgot your password then just click on forgot the password and enter your registered email and password and the password reset link will be sent to your email.
Permanently “deactivate Kik account” means you cannot login back to Kik account anymore. You need to create a fresh account if you want Kik.
Your name will be deleted from the people with whom you contacted to.
Once you permanently deactivate your account you will no longer get any message from your Kik nor any email.
The username you used to set up for your account is no longer searchable in search.
You cannot again reactivate your Kik account with your email and password registered with your Kik account.
1. Go to https://ws.Kik.com/deactivate website.
2. Enter the email address that used to login to your Kik account.
3. Click Go! A message will be dispatched to your email address.
4. Check the email account for message.
5. Open the message from Kik.
6. Click Deactivate. Your account will be deactivated and a survey will open inquiring about the reason for deactivation. The survey is selective.
1. Go to https://ws.Kik.com/delete in a website.
2. Input your username.
3. Input the email address associated with your Kik account.
4. Choose a reason for leaving Kik. This is required to delete your Kik account.
5. Check the box. By doing so you have confirmed that you "understand that [you're] permanently deactivating [your] account and [you] won't be able to login again to reactivate it."
6. Click Go! A message will be sent to your email address.
7. Check the email account associated with Kik.
8. Open the message from Kik.
9. Tap Permanently Deactivate. Your account will be deleted.
It is a good idea to backup the messages on your Kik account before deactivating it so that you will have a copy of your messages. This is particularly essential if you have important communication files on your account. One of the best ways to backup your Kik messages is to use FoneCope iPhone Data Recovery tool. The software is ideal because it allows you to preview and selectively transfer data from your iOS device which means you can export just the Kik messages. The following is a simple guide to use FoneCope iPhone Data Recovery tool to backup your Kik messages.
Step 1: Connect and Scan Your iOS Device
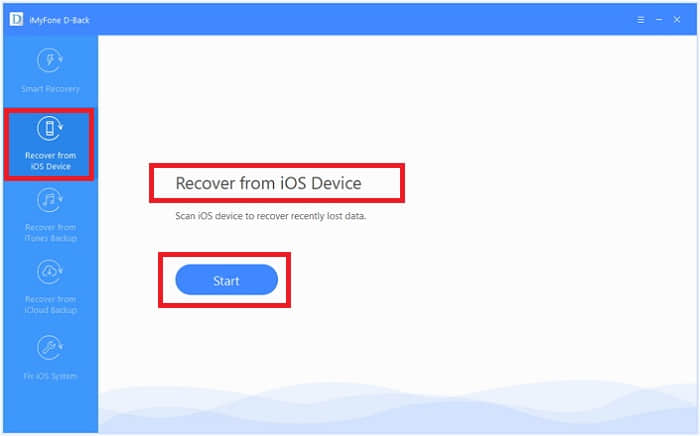
After running the data recovery software for iPhone, start at the "Recover from iOS Device" tab. Click on "Start".
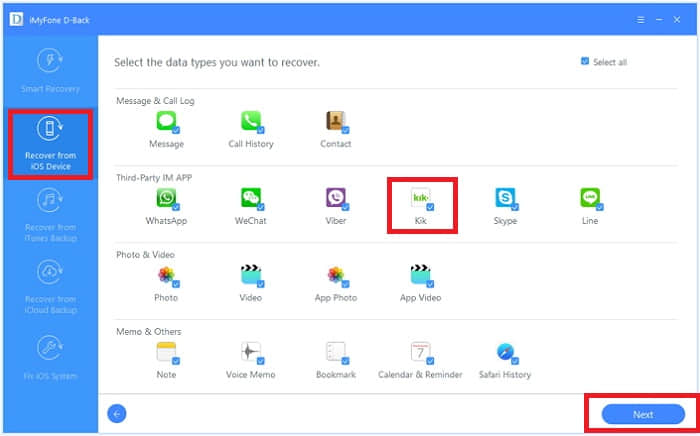
Step 2: Select the “Kik”. You will then be asked to connect your iOS device to the computer. And click “Next”.
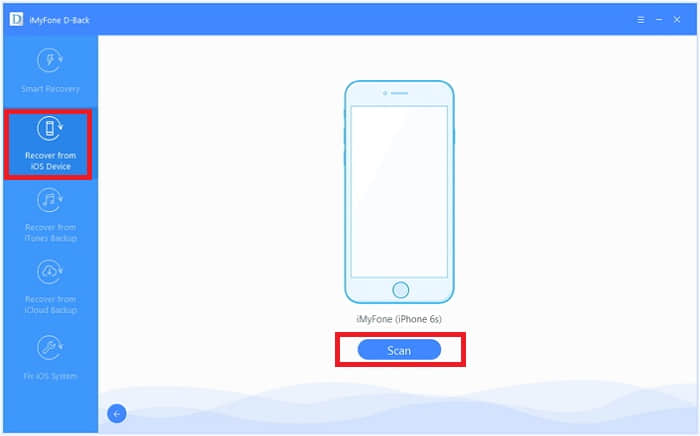
Step 3: As soon as the program successfully detects your iDevice, click "Scan" to find the data you need.
Step 4: After the scan is finished, all recoverable data will be clearly organized as the picture below shows. Click “Kik” to check all files. Choose the files which you want to recover, and then click "Recover" at the bottom right corner.
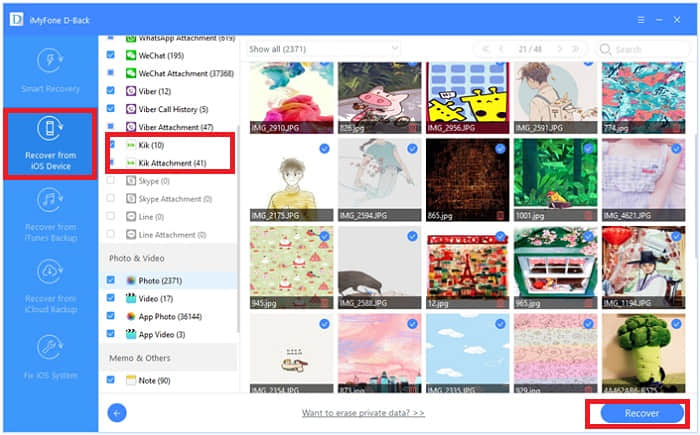
A pop-out window will show to let you pick the place to save the recovered files and it will take only a few minutes to complete the recovery.
So it was all about what is Kik, reasons to deactivate/delete it, and how to deactivate Kik as well as how to back up your Kik files with FoneCope iPhone Data Recovery tool. I hope you successfully let Kik deactivate without any hassle by using this guide. If this post is useful for you then please do share it with others. If you have any problem then feel free to contact us via email: support@fonecope.com