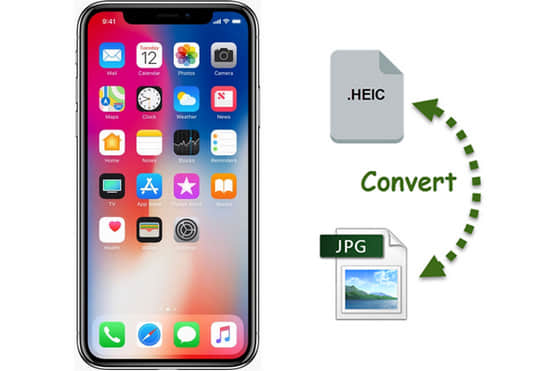
Though HEIC photos allow you to save high-quality pictures on iOS 11 with much smaller file size than JPG, its incompatibility with Windows and Android is a big problem. If you want to view your images on multiple devices, so far it is necessary to convert HEIC photos to JPG files. Therefore, this post lists 5 effective convert HEIC to JPG methods. Now let’s learn and change the iPhone image format.
1. Convert to JPG while transferring HEIC to Mac/PC (Only iPhone 7 or Later)
2. How Can I Convert HEIC Files to JPG Photos with FoneCope?
3. How do I Convert HEIC to JPG online for Free?
Go check Method 1 if you’re using iPhone 7 or later models.
FoneCope HEIC Converter Features: Convert Fast, Privacy Protected, Adjustment Setting, Reasonable Fee
Online,Dropbox,and OneDrive Features: Convert Slow, Privacy Risky, No Adjustment, Free Price
Lucky if you are owning newly released iOS models like iPhone 7, 7 Plus, 7+, 8, X. Because you can easily change a setting and transform HEIC files to JPG photo format. So far only these iOS devices have this setting option. You can check your iPhone setting now.
Grab your iPhone and tap “Settings > Photos > Transfer to Mac or PC > Automatic”
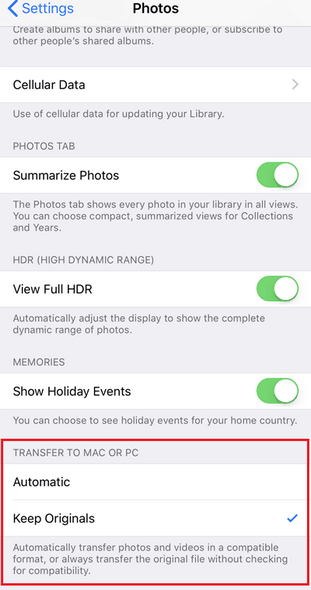
Notice! You’re recommended to make a backup before you perform a HEIC to JPG conversion. Because your images are unique and priceless. Now, you can try to transfer your iPhone pictures to computer, and check whether the HEIC files are converted or not.
FoneCope HEIC to JPG Converter definitely will allow you convert HEIC files to JPG photos with simple steps. It can change photo format at fast speed. Besides, your personal information, as well as private data, will keep to yourself only, no need to upload iOS 11 photos to the internet or any other cloud service. If you're on iPhone 6, 6 plus, 5, 5s, SE and earlier model, this is the best choice to convert HEIC to JPG.
Step 1. Plug iPhone to Win or Mac computer with a USB cable
Once the FoneCope HEIC Converter is downloaded and successfully installed, you can connect your iPhone, iPad, or iPod to computer with USB.
Step 2. Add HEIC files to convert on Windows 10/8/7/XP
Directly drag single or multiple HEIC photos to this HEIC converter program. Or you can hit the “Add HEIC” button to add HEIC folder or files.
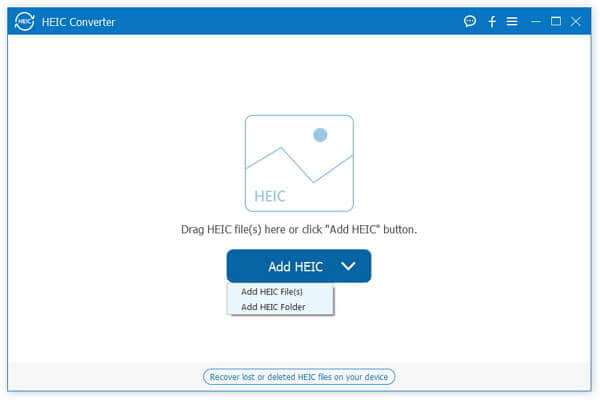
Step 3. Choose specific HEIC photos to convert
You can read the information of your HEIC files, including image Name, Size, and File Directory. Have a check and mark the ones that you want to convert. After that, go to the top right corner and confirm the Conversion Settings. You can select Format JPG/JPEG or PNG as well as the Destination Output Folder. At last, just click on the “Convert” button.
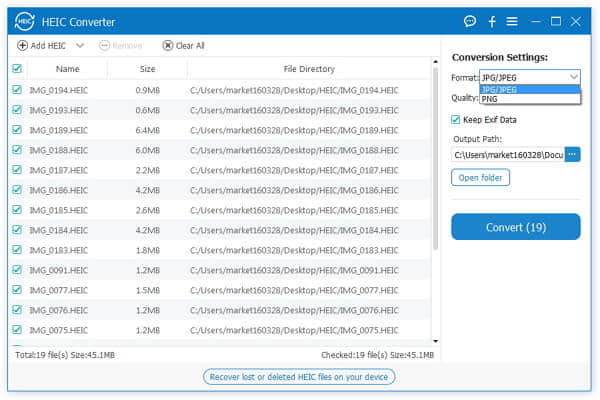
Step 4. View your JPG/PNG photos after HEIC conversion
FoneCope HEIC Convert software allows you to flawlessly change photo files format fast and safe. When this software shows you the “Convert Finished” message, click “Open folder” and view your converted pictures on PC.
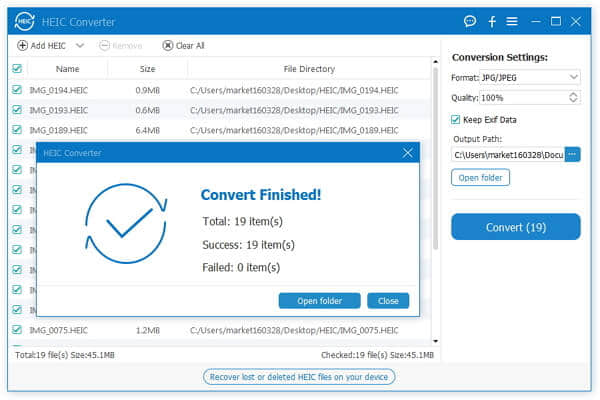
JPG is a common photo format that is compatible with Win, Mac, iOS, and Android. This HEIC to JPG converter enables you to convert images without any compromised flaw. You can view your pre-HEIC photos on Windows and Android now.
Google it and you’ll find a few websites that allow you to convert HEIC files to JPG/PNG online. There is no need to download any programs or applications to change photo file format. It’s quite simple to use.
Firstly, transfer iOS 11 photos from your device to PC. Next, open the site, and then you just need to choose .heic files from the folder or directly drag it into the frame. Wait till the conversion complete.
However, most of these sites do NOT allow you to convert HEIC to JPG without limitation. Usually, you can upload and convert HEIC photos up to 50, once. It takes a long time for the file format conversion. If you have hundreds of HEIC files to convert to JPG, you’re NOT recommended to do it online. Still, recommend you to try this site: HEICtoJPG

It’s possible to transform HEIC to JPG using Dropbox or OneDrive. How does it convert? When you upload your HEIC files, the iOS 11 pictures will be converted into JPG as long as you do these 3 steps.
Convert HEIC files to JPG Using Dropbox
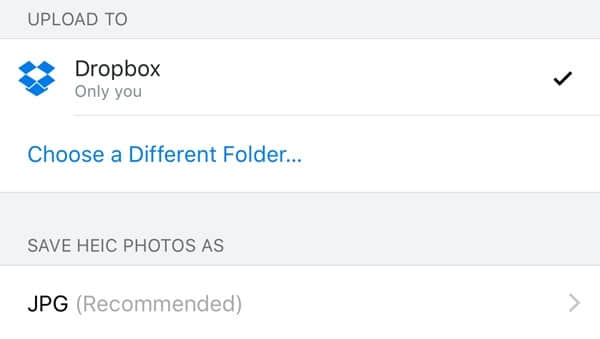
Tap and run the Dropbox app on your iPhone > Tap the setting icon on the upper left > Tap Camera Uploads to set “SAVE HEIC PHOTOS AS JPG (Recommended)” format.
Convert HEIC files to JPG Using OneDrive
OneDrive will automatically change HEIC format and upload photo files as JPG.
Lastly, you just need to download the uploaded photos from Dropbox or OneDrive on computer as JPG files.
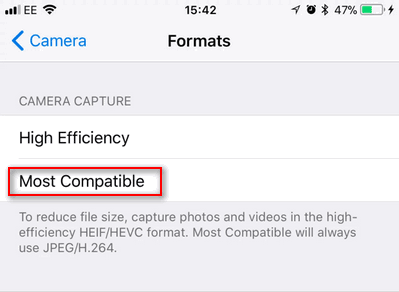
Only a few steps are needed to change the saving iPhone photo format setting. Go to Setting > Camera > Formats > Most Compatible
Thanks for reading this article. In the above part, 5 effective methods have been discussed in detail so that you can know how to convert HEIC photos to JPG file format. You can choose the most fitted solution for you and perform a HEIC to JPG conversion now. Hope this article, to some extent, makes it easier for you to change iOS 11 photos to most compatible files with simple steps.