"How can I reset an iPhone without my Apple ID password? I forgot the stupid thing."
How do you reset or erase iPhone without Apple ID? - As we all know, Apple ID is so important that you can use it to log into all the different accounts provided by Apple, such as iTunes, iCloud, Apple Store, etc. And even, if you want to wipe your iPhone, you should input the right password. So, if you forgot your Apple ID, it's awful.
Hence, I'm going to show you how to easily reset iPhone without Apple ID password.
Part 1. Factory Reset iPhone without Apple ID by Recovery Mode
Part 2. Reset iPhone Without Apple ID Password by iOS Unlock
Please notice that booting iPhone into recovery mode is power-consuming, make sure your deivce is at least 60% charged. In addition, if Find My iPhone is enabled, you'll need Apple ID password after resetting.
This mode can ensure you completely reset your iPhone without Apple ID. The specific steps are as follows.
Step 1. Firstly, you need a computer. Please launch iTunes on PC or Mac.
Step 2. Power off your device by holding buttons
For iPhone 7/6/5, use Top (or Side) button
For iPhone X/8, use Top (or Side) and a Volume button (Up or Down are both OK)
Step 3. Put your iOS device into recovery mode according to the device model
For iPhone X and 8 device: press and hold the Side/Top button. While holding the button, use a lightning cable to connect iPhone to PC/Mac. Keep pressing the Side/Top till you see the Recovery-mode logo.
Different device models share similar steps. If you have iPhone 7/7 Plus, press and hold the Volume Down for instead and follow the above steps; iPhone 6 and earlier, press and hold the Home button.
Step 4. Here, maybe you would ask when you will enter Recover mode. Don't worry, because your iTunes is smart enough to send you a pop-up message notifying you that you're in Recovery Mode.
Step 5. Then you can see this window on iTunes. And then click on 'Restore'
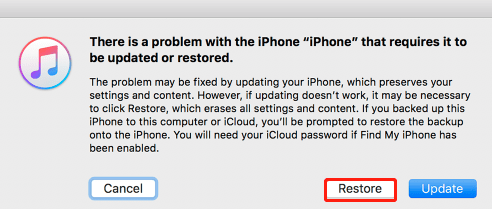
(Attention: what are you going to do would also wipe away all your data.)
Step 6. When you receive the next pop-up message, then click on "Restore" button and wait for the process being completed.
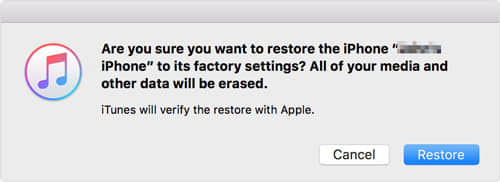
A few minutes later, the iPhone will be reset and all the data on the phone was erased permanently. This iTunes restore method can also reset iPad without Apple ID.
Note: If Find My iPhone has been enabled, you can check part 2 in this post.
There's also a good way to use FoneCope iOS Unlock to remove Apple ID without passcode and reset your iPhone. As a professional unlocking tool, it explores a variety of factors that can cause the iPhone locked, providing an easy way to reset the iPhone without Apple ID. Additionally, you also can use it to remove screen lock and restrictions passcode.
Here are the steps to reset your iPhone using the unlock Apple ID:
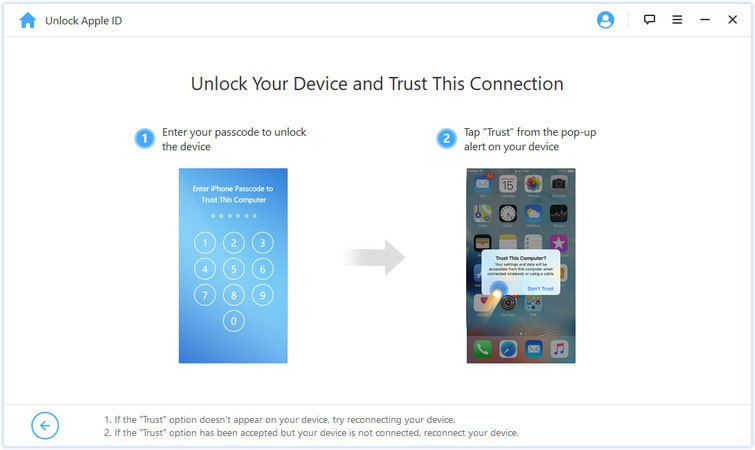
Step 1. Download FoneCope iOS Unlock via the download button. Open it, select the "Unlock Apple ID" mode and connect your iPhone to your computer.
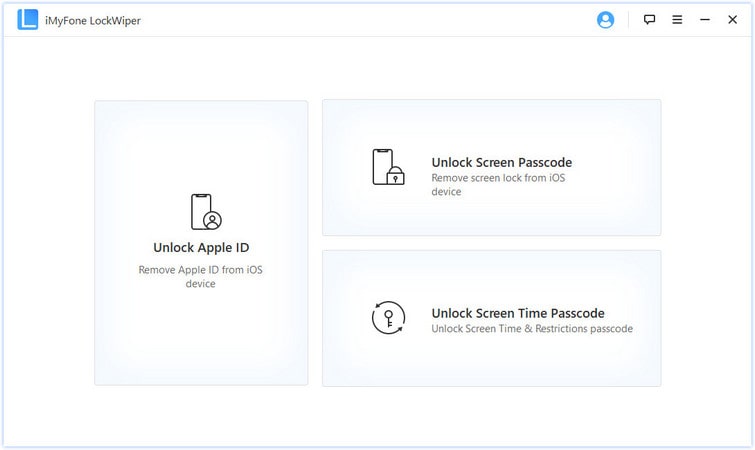
If your iPhone is connected to this computer for the first time, it will prompt you to trust the computer and choose OK.
Step 2. Select "Start to Unlock" on the computer interface.
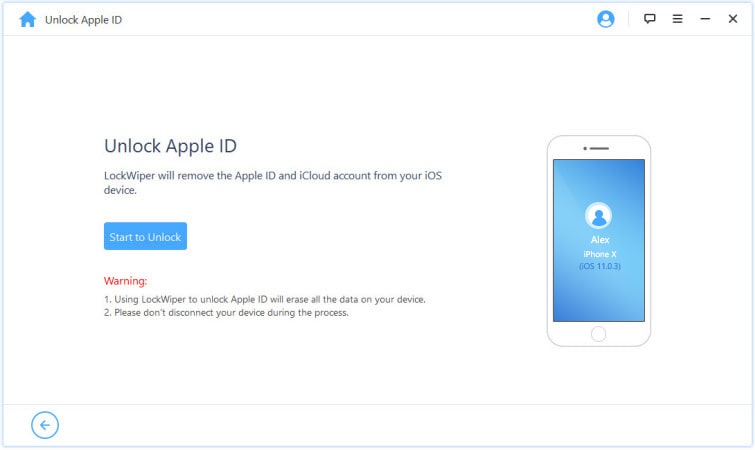
Next, iOS Unlock begins to delete the Apple ID and iCloud account that is currently logged on the iPhone.
Step 3. Whether "Find My iPhone" if Off or On:
Option 1: Not turned on:
It will automatically start unlocking the iPhone without additional steps.
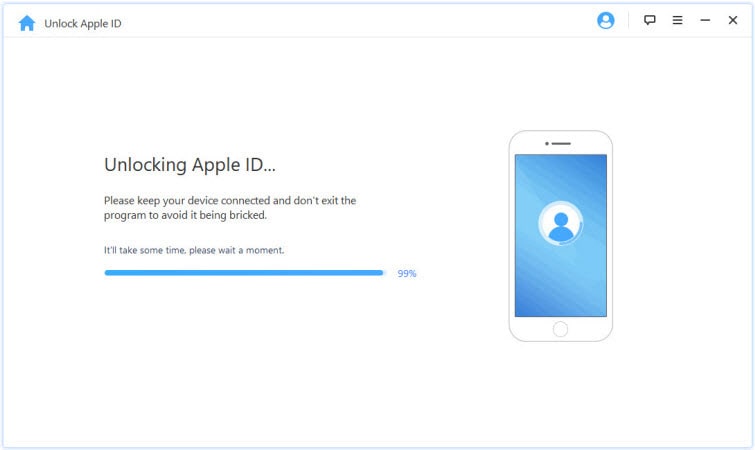
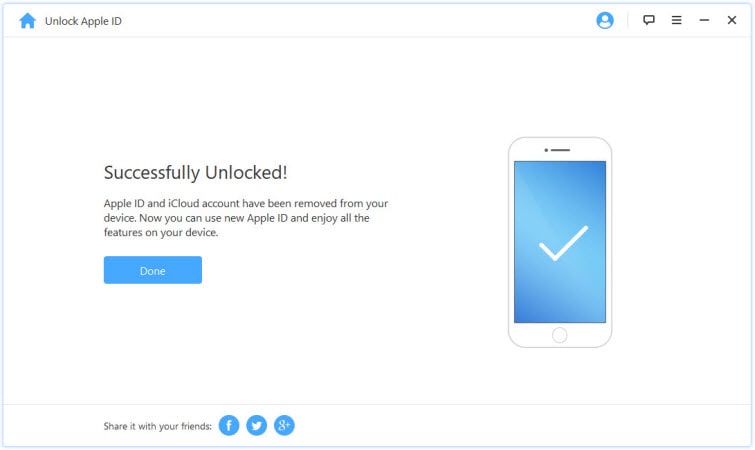
Wait a minute, and you will get the iPhone successfully unlocked.
Option 2: If you want to reset iPhone without apple id when Find My iPhone is on
Please reset all settings on iPhone.
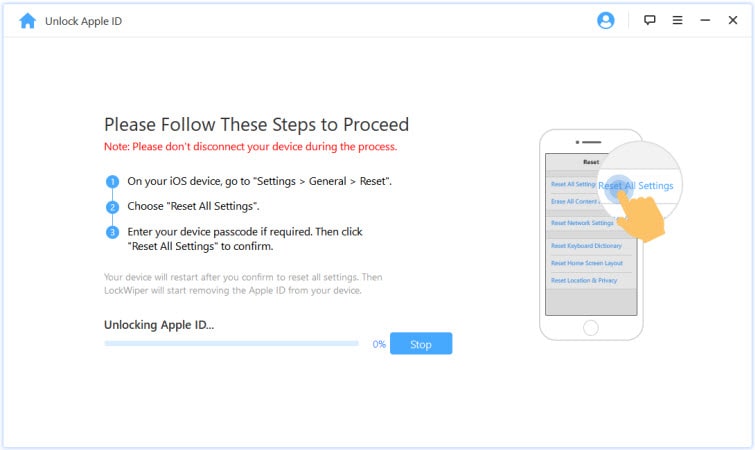
Once completed, iPhone will restart, and the program will start removing the Apple ID and iCloud account.
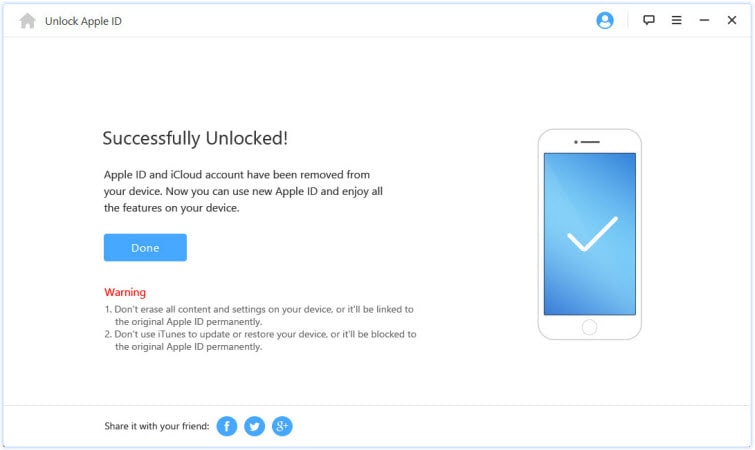
It won't take too long and your iPhone would be successfully reset without Apple ID. After that, you can choose to log in with another Apple ID or create a new one.
Also, it also supports iPad and iPod Touch, for example, resetting iPad without Apple ID password.
FoneCope iPhone Data Eraser will be an excellent choice to erase iPhone without resetting or complicated steps. In addition, if you need to resell the iPhone or give it to a friend, using iTunes to restore the device to the factory settings is not enough to make it unrecoverable.
Note: This only works when iCloud Find My iPhone is disabled.
Step 1. Connect iPhone to your computer and select Erase Private Data
Download and launch FoneCope iPhone Data Eraser on your PC or Mac. After that, you'll see the hints displayed in the main window is asking you to plug your iPhone into computer with USB.
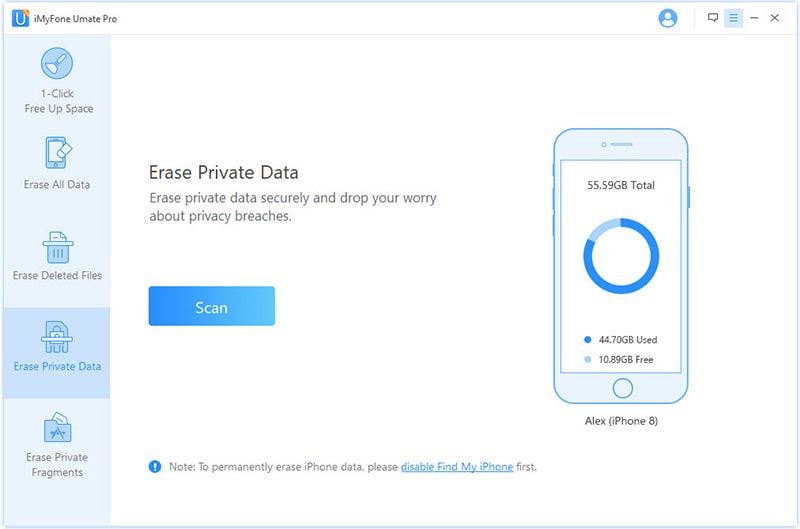
Once connected, then find and click on "Erase Private Data" on the left. As soon as successfully connected, the iPhone's name and used memory status will be displayed on the right side. Now, click on Scan.
Step 2. Select what you want to erase
Wait for the scan completes. Then, check and select the data you need to permanently delete from iPhone. After that, click on the "Erase Now" button.

Step 3. Erase iPhone without Apple ID or Restore
After confirming the Security Level, type 'delete' without quote in the text box. Finally, click "Erase Now".
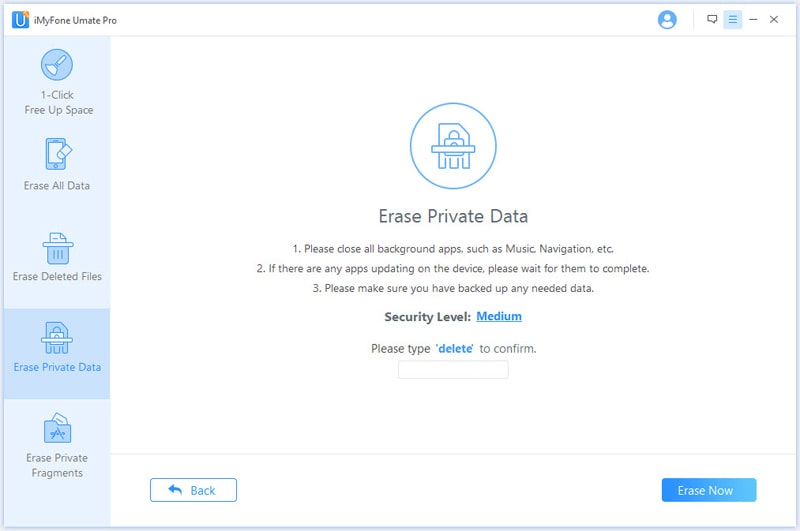
The whole process will last for about 10 minutes. Please keep the iPhone and computer connected during the time. In addition, if you encounter an iPhone restart several times, you don't need to panic.
It will permanently erase private data and personal files on iPhone. And the deleted file is 100% unrecoverable.
Besides, this article also will tell you how to restore iPhone data from iTunes and iCloud after you perform a factory reset on your iOS device. Moreover, if you are the one ask "can I just recover some data instead of all of them", you will find your answer in this post.
FoneCope iPhone Data Recovery can help you view and selectively restore data from iTunes and iCloud backup.
So, keep reading the following tutorial and learn how to retrieve lost data from iTunes and iCloud backup file.
Step 1: Select the mode "Recover from iTunes Backup"
Download and start FoneCope iPhone Data Recovery. When the following page shows up, simply choose " Recover from iTunes Backup". Click "Start" from the "Recover from iTunes Backup" tab.
Step 2: Select and scan the data types you need from backup
When you see the following window, you choose the exact backup here and then click "Next". If you choose an iTunes backup that was encrypted before, you will need to enter the password.
Select the certain file types you need and click "Scan" button. Please wait a moment while it scans.
Step 3: Preview and Recover Data from iTunes Backup
You can see the scanning results show on the next interface clearly, including the current and deleted iPhone files. Browse them according to your needs: "Show" all or "Only show the deleted files". Till now you can see the specific items. Please select the exact ones you want, and then click "Recover".
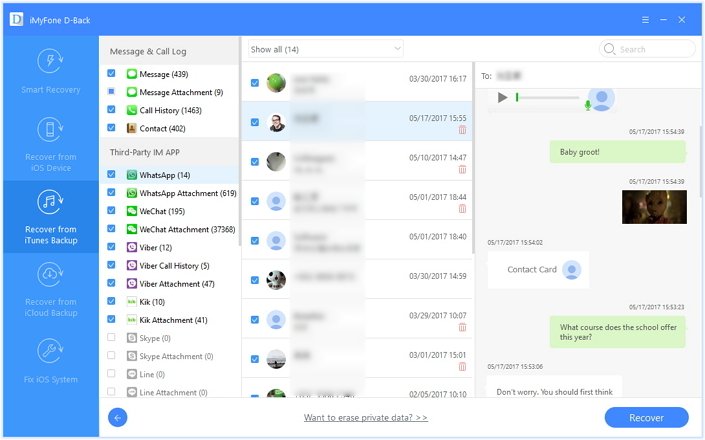
And it is recommended to create a folder to save your retrieved data. Because it helps you check the recovered data when you finish the recovery process.
Step 1. Pick recover mode "Recover from iCloud Backup"
Start FoneCope iPhone Data Recovery. When the following page shows up, simply click " Recover from iCloud Backup ". Then choose the file types that you need from this file page.
Step 2. Sign into your iCloud account with name and password
Since you want to restore your data from iCloud Backup, you need to log in iCloud Account with Apple ID first.
Step 3. Scan your lost data from iCloud backup
Choose the most relevant iCloud backup, deducing by the backup date and time. After that, it will download the selected iCloud backup file onto your PC or Mac computer. It is important to let FoneCope iPhone Data Recovery access and read the items in the iCloud backup file.
Step 4. Retrieve specific files from iCloud backup
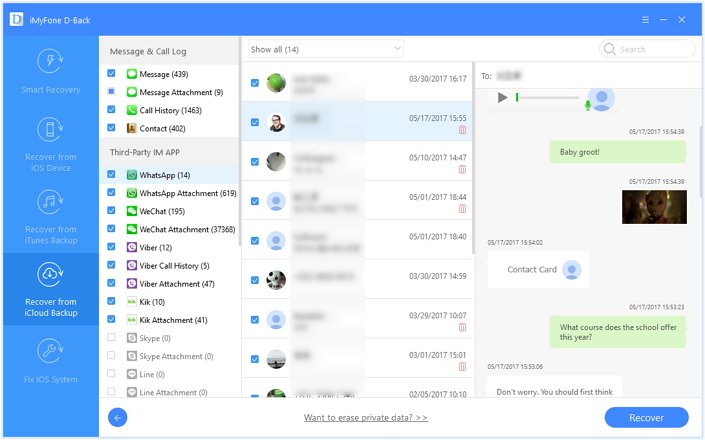
The scanning iCloud backup process takes about 10 minutes. Next, you can see all the retrievable data including the existing and deleted items. This tool allows you to preview the specific file detail so that it's convenient to find out the files you need before clicking "recover".
What has been discussed above is 3 effective methods to factory reset iPhone without Apple ID by iTunes & Recovery Mode, iOS Unlock, and FoneCope iPhone Data Eraser. What's more, if you need a better option to selectively restore files from iTunes and iCloud backup, you also can find out the answer in Part 4.
Thanks for reading all. If you tried the steps and have any suggestions, please leave a comment below.